Android Push Notification using Google Cloud Messaging (GCM) Part 1
Google Cloud Messaging enables android application to easily communicate with server for sending and receiving the data. Every time when new data is available to server it will deliver it to application in device as soon as device is found online.
We will cover push notification in two parts.
1. Registering with Google API Console and WebServer Configuration
2. Developing GCM supported Android Application
Overview of GCM Communication between Client and Server
1. Android device sends SENDER_ID and APPLICATION_ID to GCM server for registration.
2. After registration success, GCM server issues a REGISTRATION_ID to android device
3. On receiving REGISTRATION_ID, android device will send this id to web server.
4. Web Server will store GCM registration id in it database for later usage.
5. Whenever a push notification is required to send, web server sends a message to GCM server along with registration id.
6. GCM server will deliver this message to android device using registration id.
Registration with Google APIs console
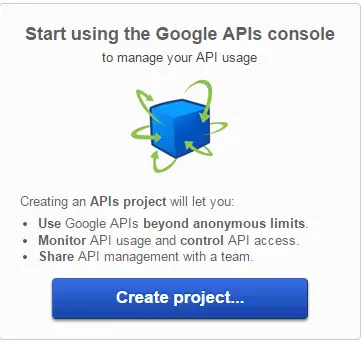
1. For enabling GCM support in an android application, We need to obtain api key from Google APIs Console page. Login using your Google id, you will get option to create a new project.
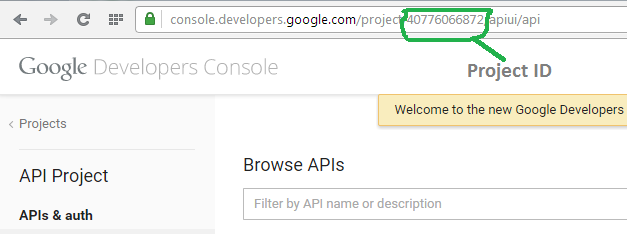
2. After creating project in above step, you will be redirected to new project. Note down project number here for later use. We will use this id as SENDER_ID in our android application. You can check it later on in project overview and project id and project number can be retrieved.
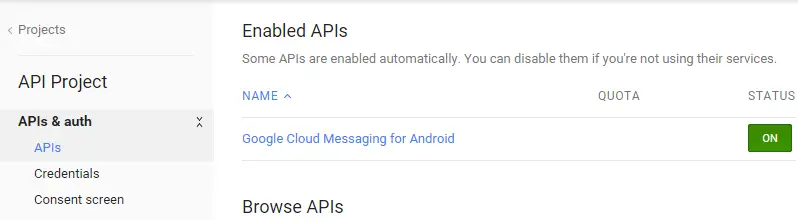
3. In API Project -> APIs & Auth section find Google Cloud Messaging for Android. Accept terms and conditions and toggle it’s status to ON.
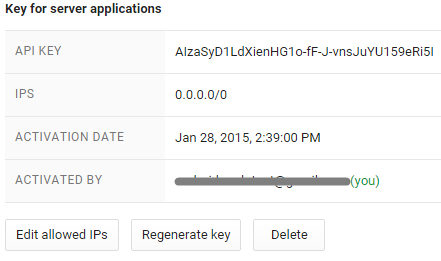
4. After enabling GCM for Android, Go to APIs & auth -> Credentials and click create new key and select server key to generate API KEY.
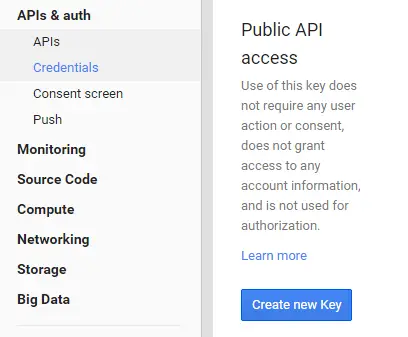
In details, fill your allowed IP’s or just mention 0.0.0.0/0 to allow all.
If you have completed above steps, you managed to get
1. Project Number
2. API KEY
Configuring Web Server
1. Download and install WampServer if not already installed. Run WampServer, click and start phpMyAdmin or navigate to http://localhost/phpmyadmin
2. Create a new database named gcm_demo. Navigate to SQL query run console and execute below query to create table users.
|
1 2 3 4 5 6 |
CREATE TABLE IF NOT EXISTS `reg_users` ( `id` int(11) NOT NULL AUTO_INCREMENT, `gcm_regid` text, `created_at` timestamp NOT NULL DEFAULT CURRENT_TIMESTAMP, PRIMARY KEY (`id`) ) ENGINE=InnoDB DEFAULT CHARSET=latin1 AUTO_INCREMENT=1 ; |
3. For sending POST request to GCM server, we will use PHP Client URL Library. Click wamp system tray icon and navigate to PHP -> PHP extensions and check if php_curl is enabled or not. If not, enable it.
4. Open www directory. Navigate wamp system tray icon -> www directory. Create a new directory name web_server_demo_gcm
5. Create a file named config.php. It will have info about database configuration and Google API KEY.
|
1 2 3 4 5 6 7 8 9 10 11 12 13 14 15 16 17 18 19 20 21 22 23 24 25 26 27 28 |
1 2 3 4 5 6 7 8 9 10 11 12 13 14 <?php /** * DB config */ define("DB_HOST", "localhost"); define("DB_USER", "root"); define("DB_PASSWORD", ""); define("DB_DATABASE", "gcm_demo"); /* * Google API Key */ define("GOOGLE_API_KEY", "AIzaSyD1LdXienHG1o-fF-J-vnsJuYU159eRi5I"); ?> |
6. Create another php file named db_connect.php for creating and closing database connection. Please refer php mysql functions for better understanding.
|
1 2 3 4 5 6 7 8 9 10 11 12 13 14 15 16 17 18 19 20 21 22 23 24 |
<?php class DB_Connect { function __construct() { } function __destruct() { } //create database conn public function connect() { require_once 'config.php'; $conn = mysql_connect(DB_HOST, DB_USER, DB_PASSWORD); mysql_select_db(DB_DATABASE); return $conn; } // close database conn public function close() { mysql_close(); } }?> |
7. Create another file db_functions.php for performing mysql operations of adding and listing users.
|
1 2 3 4 5 6 7 8 9 10 11 12 13 14 15 16 17 18 19 20 21 22 23 24 25 26 27 28 29 30 31 32 33 34 35 36 37 38 39 40 41 42 43 44 45 |
<?php class DB_Functions { private $db; function __construct() { include_once './db_connect.php'; // connect to database $this->db = new DB_Connect(); $this->db->connect(); } function __destruct() { } /** * Store user and returning user details */ public function storeUser($gcm_regid) { // insert user into database $result = mysql_query("INSERT INTO reg_users(gcm_regid, created_at) VALUES('$gcm_regid', NOW())"); // check for successful store if ($result) { // get user details $id = mysql_insert_id(); // last inserted id $result = mysql_query("SELECT * FROM reg_users WHERE id = $id") or die(mysql_error()); // return user details if (mysql_num_rows($result) > 0) { return mysql_fetch_array($result); } else { return false; } } else { return false; } } /** * list all users */ public function getAllUsers() { $result = mysql_query("select * FROM reg_users"); return $result; } }?> |
8. For sending push notification request to GCM server, create another file named gcm_sendmsg.php
|
1 2 3 4 5 6 7 8 9 10 11 12 13 14 15 16 17 18 19 20 21 22 23 24 25 26 27 28 29 30 31 32 33 34 35 36 37 38 39 40 41 42 43 44 45 46 47 48 49 50 51 52 |
<?php class GCM_SendMsg { function __construct() { } /** * send push notification */ public function send_notification($registatoin_ids, $message) { include_once './config.php'; // Set POST request variable $url = 'https://android.googleapis.com/gcm/send'; $fields = array( 'registration_ids' => $registatoin_ids, 'data' => $message, ); $headers = array( 'Authorization: key=' . GOOGLE_API_KEY, 'Content-Type: application/json' ); // Open connection $ch = curl_init(); // Set the url, number of POST vars, POST data curl_setopt($ch, CURLOPT_URL, $url); curl_setopt($ch, CURLOPT_POST, true); curl_setopt($ch, CURLOPT_HTTPHEADER, $headers); curl_setopt($ch, CURLOPT_RETURNTRANSFER, true); // disable SSL certificate support curl_setopt($ch, CURLOPT_SSL_VERIFYPEER, false); curl_setopt($ch, CURLOPT_POSTFIELDS, json_encode($fields)); // execute post $result = curl_exec($ch); if ($result === FALSE) { die('Curl failed: ' . curl_error($ch)); } // Close connection curl_close($ch); echo $result; } }?> |
9. Create yet another file register_user.php for saving user registration request from android device.
|
1 2 3 4 5 6 7 8 9 10 11 12 13 14 15 16 17 18 19 20 21 22 23 24 25 26 27 28 29 |
<?php // response json $json = array(); /** * Registering a user device * Store reg id in users table */ if (isset($_POST["regId"])) { $gcm_regid = $_POST["regId"]; include_once './db_functions.php'; include_once './gcm_sendmsg.php'; $db = new DB_Functions(); $gcm = new GCM_SendMsg(); $res = $db->storeUser($gcm_regid); $registatoin_ids = array($gcm_regid); $message = array("Hello" => "Zelda"); $result = $gcm->send_notification($registatoin_ids, $message); echo $result; } else { // required user details are not received } ?> |
10. Create file named device_sendmsg.php, it will be used to send push message to android device by requesting to GCM server.
|
1 2 3 4 5 6 7 8 9 10 11 12 13 14 15 16 17 18 19 20 21 22 23 24 25 26 27 28 29 30 |
3 4 5 6 7 8 9 10 11 12 13 14 15 16 <?php if (isset($_GET["regId"]) && isset($_GET["message"])) { $regId = $_GET["regId"]; $message = $_GET["message"]; include_once './gcm_sendmsg.php'; $gcm = new GCM_SendMsg(); $registatoin_ids = array($regId); $message = array("Hello Zelda" => $message); $result = $gcm->send_notification($registatoin_ids, $message); echo $result; }?> |
11. Create file index.php, it will list all the registered user so far and it will provide simple interface to send push message to registered user.
|
1 2 3 4 5 6 7 8 9 10 11 12 13 14 15 16 17 18 19 20 21 22 23 24 25 26 27 28 29 30 31 32 33 34 35 36 37 38 39 40 41 42 43 44 45 46 47 48 49 50 51 52 53 54 55 56 57 58 59 60 61 62 63 64 65 66 67 68 69 70 |
<!DOCTYPE html> <html> <head> <title></title> <meta http-equiv="Content-Type" content="text/html; charset=UTF-8"> <script src="http://ajax.googleapis.com/ajax/libs/jquery/1.8.2/jquery.min.js"></script> <script type="text/javascript"> $(document).ready(function(){ }); function sendPushNotification(id){ var data = $('form#'+id).serialize(); $('form#'+id).unbind('submit'); $.ajax({ url: "device_sendmsg.php", type: 'GET', data: data, beforeSend: function() { }, success: function(data, textStatus, xhr) { $('.txt_message').val(""); }, error: function(xhr, textStatus, errorThrown) { } }); return false; } </script> </head> <body> <?php include_once 'db_functions.php'; $db = new DB_Functions(); $users = $db->getAllUsers(); if ($users != false) $no_of_users = mysql_num_rows($users); else $no_of_users = 0; ?> <div > <h1>No of Devices Registered: <?php echo $no_of_users; ?></h1> <hr/> <ul class="devices"> <?php if ($no_of_users > 0) { ?> <?php while ($row = mysql_fetch_array($users)) { ?> <li> <form id="<?php echo $row["id"] ?>" name="" method="post" onsubmit="return sendPushNotification('<?php echo $row["id"] ?>')"> <label>RegistrationID: </label> <span><?php echo $row["gcm_regid"] ?></span> <br><br> <textarea rows="3" name="message" cols="25" class="txt_message" placeholder="Type message here"></textarea> <input type="hidden" name="regId" value="<?php echo $row["gcm_regid"] ?>"/> <input type="submit" class="send_btn" value="Send" onclick=""/> </div> </form> </li> <?php } } else { ?> <li> No Users Registered Yet! </li> <?php } ?> </ul> </div> </body> </html><br> |
We have accomplished Google API console registration and web server configuration. Let move to part 2 for Developing GCM supported Android Application.