Android FlashLight Torch Application Development Tutorial
With help of android Camera and Camera.Parameters, we will develop Android Flashlight Torch Application.
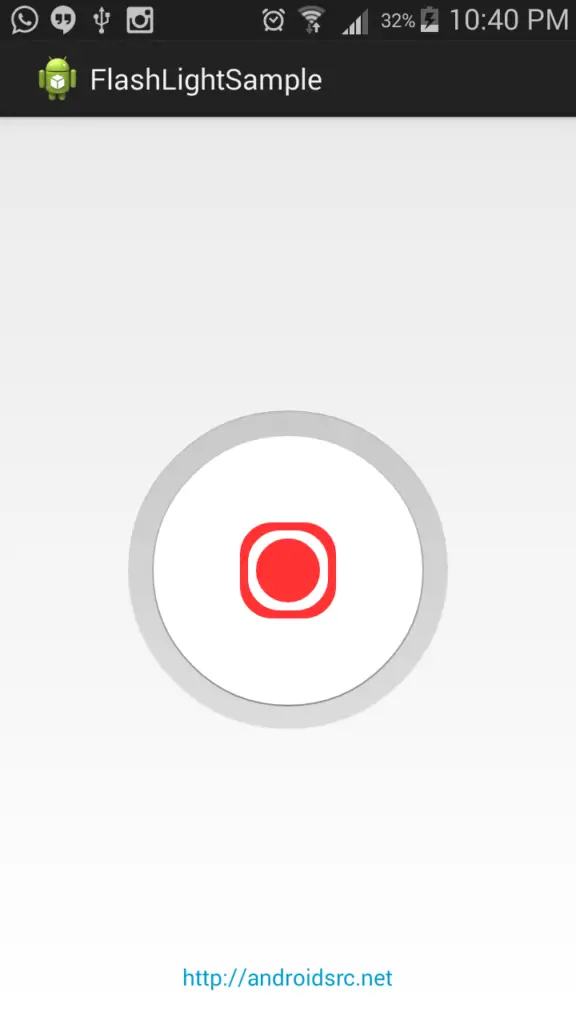
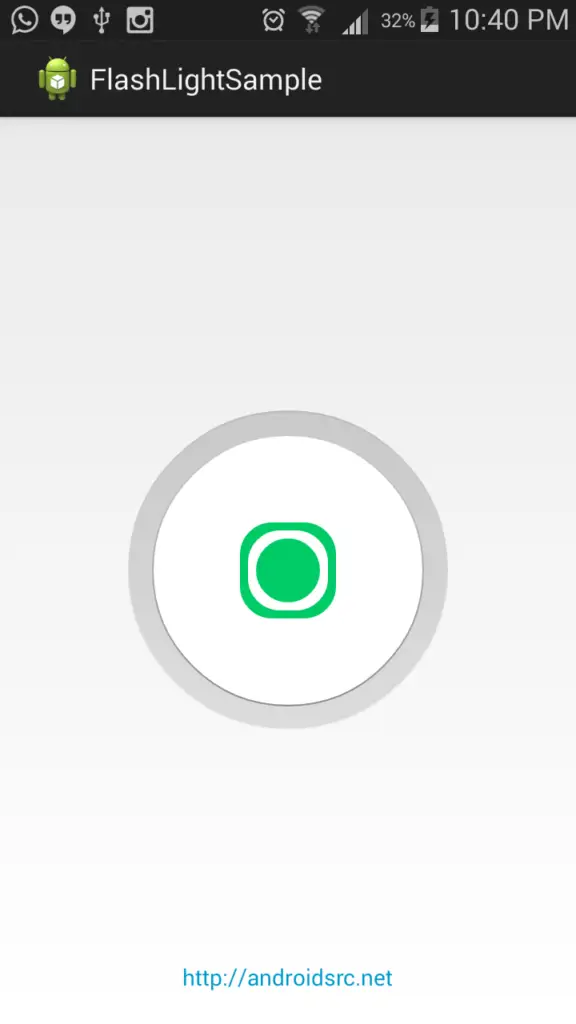
FlashLight Application
1. Preparing Application Manifest File
For accessing Camera, we need to declare uses-permission to use it along with uses-feature.
|
1 2 3 4 5 6 7 8 9 10 11 12 13 14 15 16 17 18 19 20 21 22 23 24 25 26 27 28 29 30 |
<?xml version="1.0" encoding="utf-8"?> <manifest xmlns:android="http://schemas.android.com/apk/res/android" package="com.androidsrc.flashlightsample" android:versionCode="1" android:versionName="1.0" > <uses-sdk android:minSdkVersion="14" android:targetSdkVersion="19" /> <uses-permission android:name="android.permission.CAMERA" /> <uses-feature android:name="android.hardware.camera" /> <application android:allowBackup="true" android:icon="@drawable/ic_launcher" android:label="@string/app_name" android:theme="@style/AppTheme" > <activity android:name=".MainActivity" android:label="@string/app_name" > <intent-filter> <action android:name="android.intent.action.MAIN" /> <category android:name="android.intent.category.LAUNCHER" /> </intent-filter> </activity> </application> </manifest> |
2. Preparing UI Components
Our applications main activity layout will have ImageButton for switching on/off of flashlight. Modify your /res/layout/activity_main.xml as below.
|
1 2 3 4 5 6 7 8 9 10 11 12 13 14 15 16 17 18 19 20 21 22 23 24 25 26 |
<RelativeLayout xmlns:android="http://schemas.android.com/apk/res/android" xmlns:tools="http://schemas.android.com/tools" android:layout_width="match_parent" android:layout_height="match_parent" tools:context="com.androidsrc.flashlightsample.MainActivity" > <ImageButton android:id="@+id/flashlight_button" android:layout_width="wrap_content" android:layout_height="wrap_content" android:layout_centerInParent="true" android:background="@null" android:contentDescription="@null" android:src="@drawable/flashlight_off" /> <TextView android:id="@+id/info" android:layout_width="wrap_content" android:layout_height="wrap_content" android:layout_alignParentBottom="true" android:layout_centerHorizontal="true" android:layout_marginBottom="20dp" android:text="http://cs2guru.com" android:textColor="@android:color/holo_blue_dark" /> </RelativeLayout> |
For designing ImageButton image resource with 3D effect, I have opted layer-list drawable from this stackoverflow by savanto.
We will two create drawable for on and off torch state.
/res/drawable/flashlight_off.xml
|
1 2 3 4 5 6 7 8 9 10 11 12 13 14 15 16 17 18 19 20 21 22 23 24 25 26 27 28 29 30 31 32 33 34 35 36 37 38 39 40 41 42 43 44 45 46 47 48 49 50 51 52 53 54 55 |
<?xml version="1.0" encoding="utf-8"?> <layer-list xmlns:android="http://schemas.android.com/apk/res/android"> <!-- Outside border/shadow --> <item> <shape android:shape="oval"> <size android:width="200dp" android:height="200dp" /> <gradient android:angle="90" android:startColor="#f4f4f4" android:endColor="#b9b9b9" /> </shape> </item> <!-- Inset --> <item android:top="1dp" android:left="1dp" android:right="1dp" android:bottom="1dp"> <shape android:shape="oval"> <gradient android:angle="90" android:startColor="#dcdcdc" android:endColor="#c9c9c9" /> </shape> </item> <!-- Inside border/shadow --> <item android:top="15dp" android:left="15dp" android:right="15dp" android:bottom="15dp"> <shape android:shape="oval"> <gradient android:angle="90" android:startColor="#8c8c8c" android:endColor="#cbcbcb" /> </shape> </item> <!-- Main button --> <item android:top="16dp" android:left="16dp" android:right="16dp" android:bottom="16dp"> <shape android:shape="oval"> <solid android:color="#ffffff" /> </shape> </item> <!-- Button image --> <item android:top="70dp" android:left="70dp" android:right="70dp" android:bottom="70dp"> <shape android:shape="rectangle"> <solid android:color="#FF3333" /> <corners android:radius="20dp" /> </shape> </item> <item android:top="75dp" android:left="75dp" android:right="75dp" android:bottom="75dp"> <shape android:shape="rectangle"> <solid android:color="#ffffff" /> <corners android:radius="20dp" /> </shape> </item> <item android:top="80dp" android:left="80dp" android:right="80dp" android:bottom="80dp"> <shape android:shape="rectangle"> <solid android:color="#FF3333" /> <corners android:radius="20dp" /> </shape> </item> </layer-list> |
/res/drawable/flashlight_on.xml
|
1 2 3 4 5 6 7 8 9 10 11 12 13 14 15 16 17 18 19 20 21 22 23 24 25 26 27 28 29 30 31 32 33 34 35 36 37 38 39 40 41 42 43 44 45 46 47 48 49 50 51 52 53 54 55 |
<?xml version="1.0" encoding="utf-8"?> <layer-list xmlns:android="http://schemas.android.com/apk/res/android"> <!-- Outside border/shadow --> <item> <shape android:shape="oval"> <size android:width="200dp" android:height="200dp" /> <gradient android:angle="90" android:startColor="#f4f4f4" android:endColor="#b9b9b9" /> </shape> </item> <!-- Inset --> <item android:top="1dp" android:left="1dp" android:right="1dp" android:bottom="1dp"> <shape android:shape="oval"> <gradient android:angle="90" android:startColor="#dcdcdc" android:endColor="#c9c9c9" /> </shape> </item> <!-- Inside border/shadow --> <item android:top="15dp" android:left="15dp" android:right="15dp" android:bottom="15dp"> <shape android:shape="oval"> <gradient android:angle="90" android:startColor="#8c8c8c" android:endColor="#cbcbcb" /> </shape> </item> <!-- Main button --> <item android:top="16dp" android:left="16dp" android:right="16dp" android:bottom="16dp"> <shape android:shape="oval"> <solid android:color="#ffffff" /> </shape> </item> <!-- Button image --> <item android:top="70dp" android:left="70dp" android:right="70dp" android:bottom="70dp"> <shape android:shape="rectangle"> <solid android:color="#00CC66" /> <corners android:radius="20dp" /> </shape> </item> <item android:top="75dp" android:left="75dp" android:right="75dp" android:bottom="75dp"> <shape android:shape="rectangle"> <solid android:color="#ffffff" /> <corners android:radius="20dp" /> </shape> </item> <item android:top="80dp" android:left="80dp" android:right="80dp" android:bottom="80dp"> <shape android:shape="rectangle"> <solid android:color="#00CC66" /> <corners android:radius="20dp" /> </shape> </item> </layer-list> |
3. Preparing Source Files
In our application launcher activity MainActivity.java, we will use a boolean variable to toggle between Camera flash state. We need to check first if flash feature PackageManager.FEATURE_CAMERA_FLASH is supported by your device hardware. Make sure to set View.OnClickListener for your ImageButton. On Clicking of ImageButton, if flash light is OFF we will turn it on by setting paramters Parameters.FLASH_MODE_TORCH and calling startPreview(). If flash light is ON, we will turn it off setting Parameters.FLASH_MODE_OFF and call stopPreview(). We need to make sure to release camera if held while exiting activity.
|
1 2 3 4 5 6 7 8 9 10 11 12 13 14 15 16 17 18 19 20 21 22 23 24 25 26 27 28 29 30 31 32 33 34 35 36 37 38 39 40 41 42 43 44 45 46 47 48 49 50 51 52 53 54 55 56 57 58 59 60 61 62 63 64 65 66 67 68 69 70 71 72 73 74 75 76 77 78 79 80 81 82 83 84 85 86 87 |
package com.androidsrc.flashlightsample; import android.app.Activity; import android.app.AlertDialog; import android.content.DialogInterface; import android.content.DialogInterface.OnClickListener; import android.content.pm.PackageManager; import android.hardware.Camera; import android.hardware.Camera.Parameters; import android.os.Bundle; import android.view.View; import android.widget.ImageButton; public class MainActivity extends Activity { private Camera camera; private Camera.Parameters parameters; private ImageButton flashLightButton; boolean isFlashLightOn = false; @Override protected void onCreate(Bundle savedInstanceState) { super.onCreate(savedInstanceState); setContentView(R.layout.activity_main); flashLightButton = (ImageButton) findViewById(R.id.flashlight_button); flashLightButton.setOnClickListener(new FlashOnOffListener()); if (isFlashSupported()) { camera = Camera.open(); parameters = camera.getParameters(); } else { showNoFlashAlert(); } } private class FlashOnOffListener implements View.OnClickListener { @Override public void onClick(View v) { if (isFlashLightOn) { flashLightButton.setImageResource(R.drawable.flashlight_off); parameters.setFlashMode(Parameters.FLASH_MODE_OFF); camera.setParameters(parameters); camera.stopPreview(); isFlashLightOn = false; } else { flashLightButton.setImageResource(R.drawable.flashlight_on); parameters.setFlashMode(Parameters.FLASH_MODE_TORCH); camera.setParameters(parameters); camera.startPreview(); isFlashLightOn = true; } } } private void showNoFlashAlert() { new AlertDialog.Builder(this) .setMessage("Your device hardware does not support flashlight!") .setIcon(android.R.drawable.ic_dialog_alert).setTitle("Error") .setPositiveButton("Ok", new OnClickListener() { @Override public void onClick(DialogInterface dialog, int which) { dialog.dismiss(); finish(); } }).show(); } private boolean isFlashSupported() { PackageManager pm = getPackageManager(); return pm.hasSystemFeature(PackageManager.FEATURE_CAMERA_FLASH); } @Override protected void onDestroy() { if (camera != null) { camera.stopPreview(); camera.release(); camera = null; } super.onDestroy(); } } |
4. Building and Running Application
Now build and run your applications, you are done with Android FlashLight Torch Application using Camera and Camera.Parameters.
