Create flavors of Android App on same CodeBase
In this post i will cover how to create flavors of android app like paid version and free version.
Problem with previous Solutions
- One way to do this is to create two codebase for your Android app. Problem with this is we have to maintain two different codebase for paid and free version which will a nightmare to maintain. If you make some change to one code then same has to be done with other code. This will be more problematic when this type of flavors increase.
- Other way people used to deal with this kind of problem by creating a library project for common codebase and then flavors can be created in the app which are using that library project. There were many problems related to that solution.
But with new Android Studio create flavors android app can be solved by using build flavor feature of gradle build system. You just have to create flavors of app which will pick code from common codebase and rest code from your flavor folder.
Steps to create App flavors
For this we have declare flavors in our gradle.build file in our app module. Let us assume we want to create 2 flavor of our app . One for free version and other for paid version. In this case we have to declare 2 flavors in gradle.build file. After that we can add flavor specific compilation related code there like debug info.
|
1 2 3 4 5 6 7 8 9 10 11 12 |
android{ productFlavors { free { buildConfigField 'String', 'VAR', '"This is string from FREE build script"' } paid { applicationId "com.aman.appflavour.prod" buildConfigField 'String', 'VAR', '"This one is from PAID build script"' } } } |
Above code will create 2 flavors of android app as you can see it in below image.

As you can see that both flavors will have debug and release kind of variants. This can be used to create different apk for debug and release. You can switch between different flavors by choosing it from this drop down list.
You must be wandering what the heck is this buildConfigField ‘String’, ‘VAR’, ‘”This one is from PAID build script”‘ in this gradle file. Actually this is very useful utility. This line will create a String constant named VAR in BuildConfig.java file which will be different for both flavor (if we want) just like in this case.
This can be very useful in case like we have to use different host url for both our flavor. Then we can simply declare variables in this gradle file and flavor specific variable will be used at compilation time like happening in this tutorial with VAR variable. We can also use different package name for both flavors so that we can install both flavor side by side.
How to manage Flavor code.
After declaring flavors in gradle file. We can add file in our src directories that can be overridden for different flavors. Now we can create folders under src folder of our project and we can add code there which will be private to that flavor under which it has put. As shown below folder under RED is for free version of app and folder under GREEN is for paid version. Code under PURPLE will be used by both flavors i.e this is common code which both flavor will share.
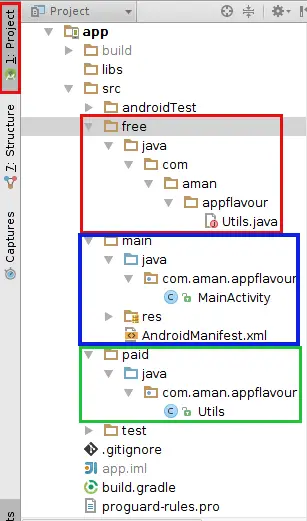
Note : You cannot add same file in main and any flavor of app at the same time this will show error. So the flavor specific file should reside in all the flavor folder and should not be present in main. Example we cannot create file name MainAcitivity.java inside com.aman.appflavour package in any of the flavor of app. This will give compilation errors. Same is with Utils.java file which is created in both flavors. This cannot be created in main folder.
But with resources its different. You can have flavor specific resource in res folder and build give priory to flavor specific resource and if it is not present then it will pick it from main res folder.
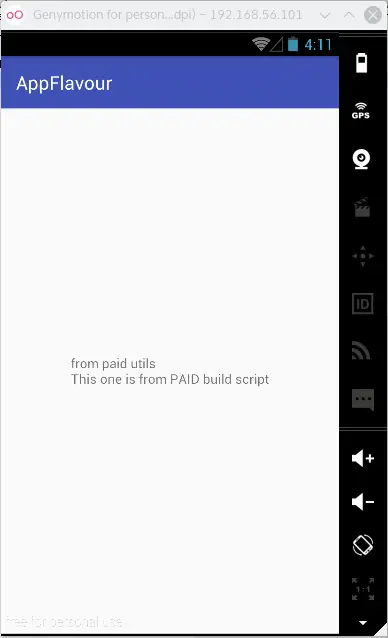
Preview

References :
http://developer.android.com/tools/building/configuring-gradle.html