How to move Pictures to a Facebook Album Android
Have you moved photos from your camera or SD card to your computer, only to realize you missed one—or a dozen? When it’s time to move those photos over to Facebook, you’ll want to take all the pictures you transferred over and put them into a Facebook album.
But Facebook won’t let you move pictures to a Facebook album from your hard drive. Instead, open your Facebook app and click on the album you want to move pictures to. Select all the photos you want to move, then tap the More icons on the top right and select Upload Photos to Album.
Picture and video sharing via social media platforms like Facebook and Snapchat are all the rage these days. With so many people taking photos, sharing them, and viewing them via smartphones, it makes sense to want your images stored locally, rather than on the cloud.
However, if you want to move your photos and videos from your smartphone to your computer or laptop, it’s easy to do with the right steps. Here’s how to move pictures from Android to Windows.
Before we begin

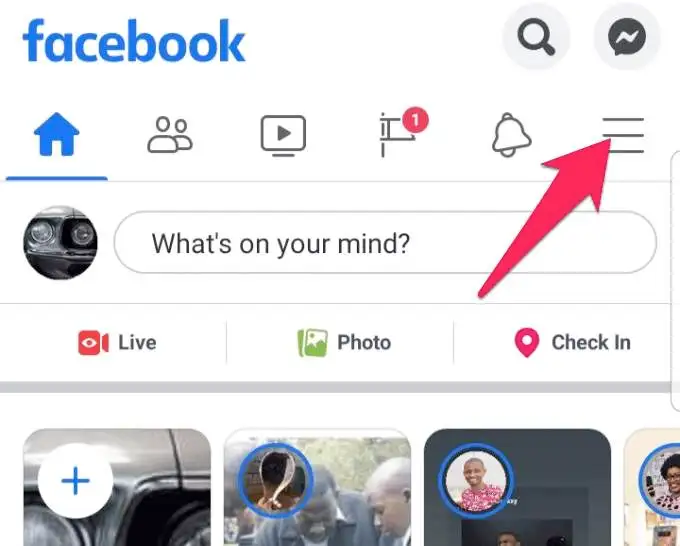
Moving pictures to a Facebook photo album on Android is simple. First, locate the photos you want to move. Next, open Facebook, and tap the picture that you want to move. Next, tap the three dots in the upper right corner of the photo. This will show a list of options, choose “Move to Album”, and then tap “Move”. Now, select the new album where you want to move the pictures and tap the “Move” button. Once the pictures are moved, you can delete the photo from your account.
If you’ve been using Facebook for as long as I can remember, you’ve probably seen friends post photos with status updates. Just recently, Facebook introduced a new feature that allows you to move these photos from your friend’s wall to your Facebook photo album, and it’s incredibly easy to use.
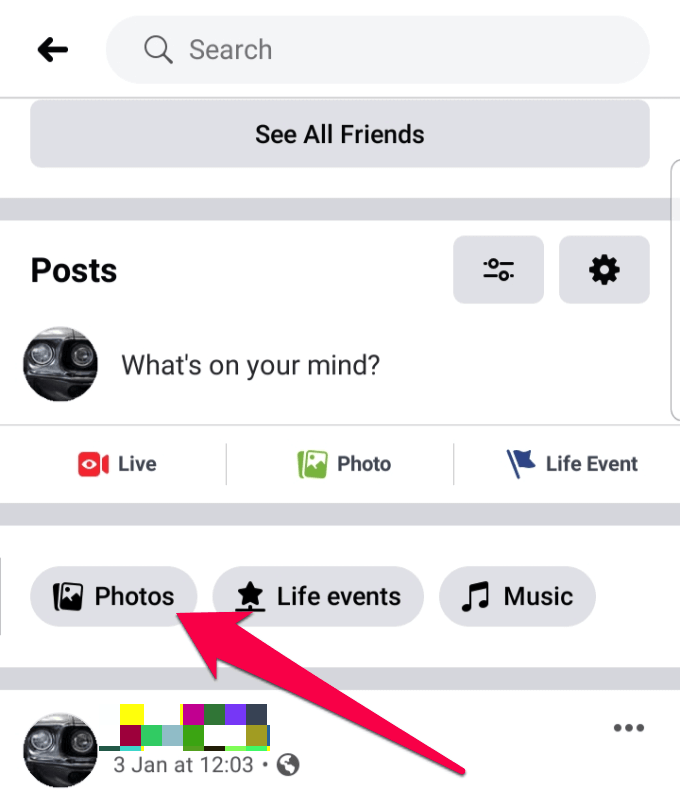
Sharing pictures on Facebook is easy and fun. Uploading pictures from different devices can be even simpler. On your Android phone, open the Facebook App, and go to the Photos menu. Tap on the Camera icon and point your phone’s camera at the picture you want to upload. Use the arrows on the screen to choose the album you want the picture to be in. Press the Upload button, and you’re done.
How to Downloading the Facebook Application
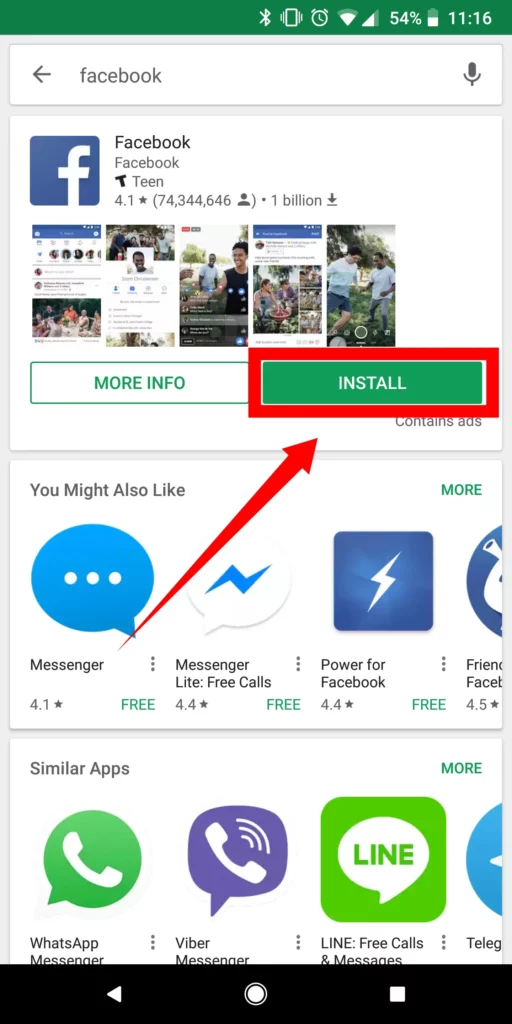
Facebook provides hundreds of applications, but they aren’t all free. If you want to download them, you will first need to download and install the Facebook application. This is required because Facebook doesn’t allow you to download applications from its website. So you need to go to google’s play store and from there you can quickly and easily download the Facebook app it also depends on your internet speed and how much time it takes.
Facebook is the world’s largest social network, and if you’re on it, you’re probably constantly telling people about the awesome things you’re doing. But did you know that Facebook can also be used to share interesting articles and pictures? Once you’ve downloaded the Facebook Application, you’ll also be able to easily share content from other websites too.
The Facebook Application allows you to stay connected to your Facebook community wherever you go. Therefore, downloading the application is a good way to become even more familiar with Facebook. In this guide, you will learn how to download the Facebook application on an iPhone, Android, BlackBerry, and Windows Phone.
Downloading the Facebook application on your computer/phone can be simple. Facebook is the most popular social application with over 1 billion people and counting. Facebook was designed to enable people to connect and share information with their friends. Over time it has become an internet phenomenon and the largest social networking website in the world.
People use Facebook to keep up with friends, upload an unlimited number of photos and videos, play games, and watch videos. Facebook also allows users to set up personal profiles and connect with other people to build a network.
Uploading pictures to a Facebook album on an android device

Facebook has updated its Android app with support for uploading photos directly to a user’s Facebook account, rather than using a third-party photo-sharing service like Google Photos. To upload a picture to an album, users simply click “Add Photos” under the album’s cover image. From there, they can select photos stored on the device, as well as photos saved to the microSD card.
Many users frequent Facebook with their Android phones and tablets. Posting pictures to Facebook is a snap. First, you’ll need to compose your text, then tap the photo you want to upload. When you’re ready, tap on the camera icon or choose the camera icon from the Facebook app’s icons, and point the phone’s camera at the photo you want to upload.
You can also select the photo from your camera roll — just tap on the photo to select it. Finally, tap on the post button, and you’re done! If you want to adjust the photo’s size before posting, just tap on the slider at the bottom of the screen.
Are you having trouble uploading pictures to Facebook? Does Facebook say your photos are too big? If so, you can reduce the size by uploading them to Google Photos.
Most of us have digital photos stored on our phones that we want to upload to Facebook. To do that, you’ll have to create a Facebook album, upload the photos you want, and add captions. The best way to do this is using Facebook’s desktop site. On the desktop site, you can create an album, upload photos, and add captions before you share the album on Facebook.
Uploading pictures to a Facebook album on an android device is a simple process. Find your album, select the pictures you’d like to upload, and then click the “upload” button. If you’d rather upload the photos from your computer instead, you’ll need to log into your Facebook account using a web browser on your computer, and then follow the same steps.
Other features of Facebook
Facebook is your friend when it comes to keeping in touch, but there are a few features on Facebook that you may not be aware of. One of the more useful features is the gallery. Facebook’s gallery allows its users to upload their pictures.
But if you have pictures that were taken on your phone, you can take a picture and upload it directly. Your photos are automatically added to Facebook’s gallery, and you can easily choose the pictures you want to view, share or upload.
Facebook has a couple of ways to manage your photos. Using an Android device, you can easily post pictures to your Facebook timeline by following a few simple steps. First, open your browser and log into your account. Select “Photos” from the sidebar menu. Then, click “Albums” from the menu on the left. Once in the album view, tap the album you want to move photos from.
That’s the solution I hope you like it
Facebook’s Android app needed some updating recently, and it added the ability to move pictures to a Facebook album. To use this feature, you have to connect to a Wi-Fi network first. Then, simply tap on the photos you want to move, and tap on the three dots in the upper right corner of the screen. Tap on “Move to Album” and choose which album you want to put them in. When you open the album, you’ll be able to see all of the photos you moved.
For the latest tips and tricks or to fix any issue with your android smartphone, click here.