What is Exchange Services App Android: A Comprehensive Guide
Are you an Android user who is curious about the Exchange Services app? Look no further! In this comprehensive guide, we will unravel all the mysteries surrounding the Exchange Services app on your Android phone. From understanding what it is and what it does to learning how to use it and even how to turn it off if you wish. We will also dive into the meaning of Exchange in email and explain what an Exchange account is.
Additionally, we will address common questions like whether you can delete the Exchange Services app, the consequences of doing so, and how to disable or uninstall it permanently. So, if you want to master the ins and outs of the Exchange Services app on your Android device, keep reading!
What is Exchange Services App Android?
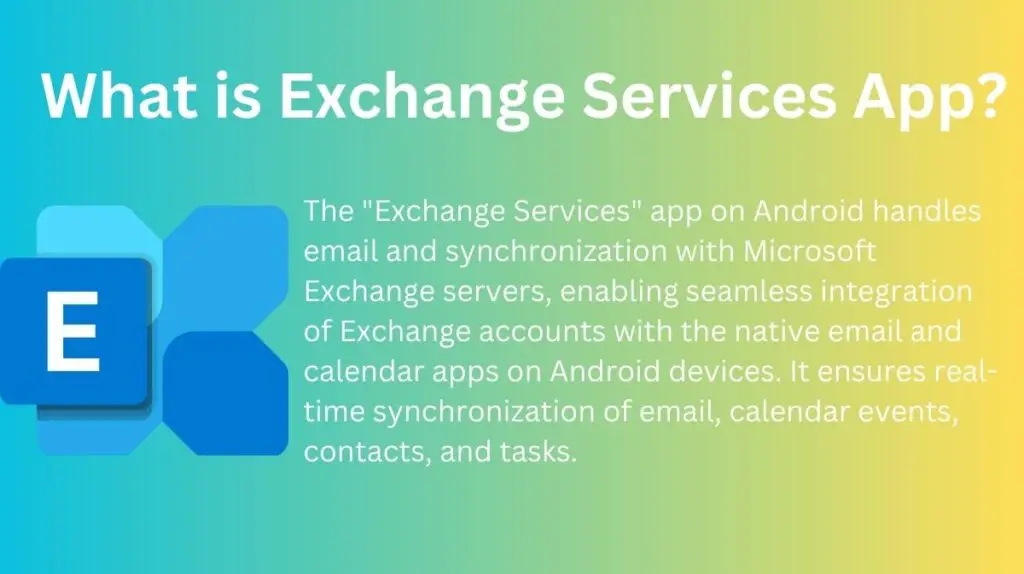
The Exchange Services app for Android is a system app that comes pre-installed on many Android devices. It is related to the functionality of Microsoft Exchange, which is an email and calendaring server developed by Microsoft.
The Exchange Services app allows Android devices to connect and synchronize with Microsoft Exchange servers, enabling users to access their work emails, calendars, contacts, and other Exchange-related data on their Android devices. This app is essential for users who use Exchange-based email accounts, especially in corporate or business settings.
What do the Exchange services do on my Android phone?

Exchange services on your Android phone are responsible for enabling synchronization with Microsoft Exchange servers. Here’s what the Exchange services do on your Android phone:
- Email Synchronization: The Exchange services allow you to receive, send, and manage your work or business emails from your Android device. It ensures that your email inbox is always up-to-date and in sync with your Exchange server.
- Contact and Calendar Synchronization: Exchange services synchronize your Android phone’s address book and Exchange calendar with the native calendar app on your Android device. This enables you to view and manage your appointments, meetings, and events across devices.
- Task Synchronization: If you use tasks or to-do lists in your Exchange account, the Exchange services will synchronize them with your Android device, allowing you to stay organized and manage your tasks efficiently.
- Remote Wipe and Security Features: Exchange services implement security features like remote wipe, allowing your company’s IT administrators to remotely erase the data on your device in case it gets lost or stolen. This helps protect sensitive business information.
- Integration with Native Apps: Exchange services integrate with the native email, calendar, and contacts apps on your Android device, providing a seamless experience and ensuring that your Exchange data is accessible through familiar interfaces.
How Do I Use Exchange on Android?
To use Exchange on your Android device, you’ll need to set up your Exchange email account. Here’s a step-by-step guide on how to do it:
- Open the Settings App: Open the “Settings” app on your Android device. The location of the Settings app may vary slightly depending on your device’s manufacturer and Android version, but it’s usually represented by a gear icon.
- Accounts: Scroll down in the Settings menu and look for an option called “Accounts” or “Accounts and Backup.” Tap on it.
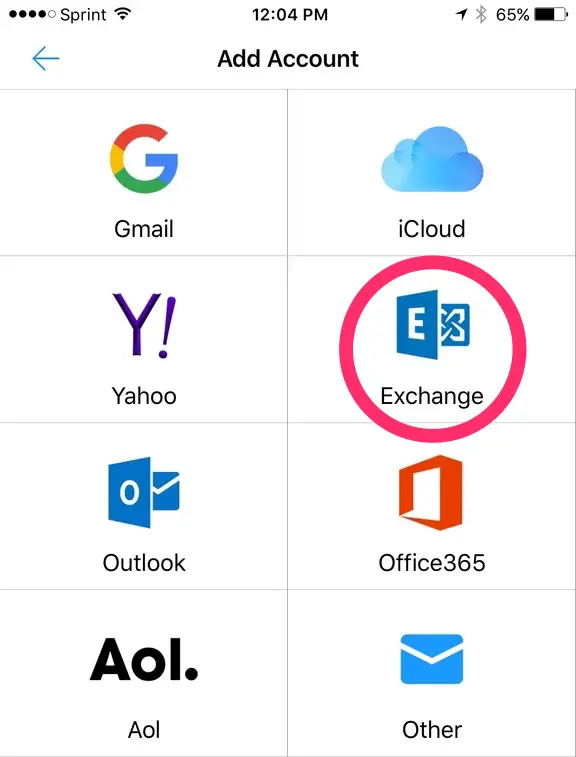
- Add Account: In the “Accounts” section, tap on “Add account” or “Add account +“.
- Microsoft Exchange: You will see a list of account types. Select “Microsoft Exchange” or “Exchange” from the list. On some devices, it might be labeled as “Corporate,” “Work,” or “Microsoft Exchange ActiveSync.”
- Enter Email Address: Enter your Exchange email address (e.g., yourname@yourcompany.com) and tap “Next.”
- Password and Sign-In: Enter your Exchange email account password and any additional information requested (such as domain or username). Tap “Next” or “Sign In.”
- Permissions: The Exchange services will request permission to access certain features on your device. Grant the necessary permissions to continue.
- Sync Options: You can customize the sync settings for your Exchange account. You can choose to synchronize emails, calendars, contacts, and other data. Select the data types you want to sync and tap “Next” or “Done.”
- Exchange Account Setup Complete: Once the setup is complete, you should see a confirmation message. Your Exchange email account is now set up on your Android device.
- Accessing Exchange Data: You can access your Exchange emails, calendar events, contacts, and tasks through their respective apps on your Android device. For example, you can use the native Email app to read and send Exchange emails, the Calendar app to view and manage your Exchange calendar, and the Contacts app to access your Exchange contacts.
- Exchange Settings (Optional): If you want to change or update your Exchange account settings, you can do so by going to the Settings app, then to “Accounts” and selecting your Exchange account.
Please note that the steps may vary slightly based on your Android device’s manufacturer and software version. Additionally, some companies may have specific security policies that require additional steps, such as using a security PIN or verifying your device.
How Do I Turn Off Exchange on My Android?
To turn off Exchange on your Android device, you’ll need to remove or delete the Exchange email account from your device. Here’s how you can do it:
- Open the Settings App: Open the “Settings” app on your Android device. The location of the Settings app may vary slightly depending on your device’s manufacturer and Android version, but it’s usually represented by a gear icon.
- Accounts: Scroll down in the Settings menu and look for an option called “Accounts” or “Accounts and Backup.” Tap on it.
- Select Exchange Account: In the “Accounts” section, you should see a list of all the accounts linked to your device. Look for your Exchange email account (e.g., yourname@yourcompany.com) and tap on it.
- Account Settings: After selecting your Exchange account, you’ll see the account settings screen. It will display information about the account, such as email address, sync settings, and more.
- Remove Account: Look for an option that says “Remove account,” “Delete account,” or something similar. The wording may vary based on your Android device’s manufacturer and software version. Tap on this option to proceed with removing the Exchange account.
- Confirmation: A confirmation prompt will appear asking if you are sure you want to remove the account. Confirm the action by tapping “Remove” or “Delete.”
- Account Removed: After confirming, the Exchange account will be removed from your Android device, and any associated data (emails, contacts, calendar events) will no longer be accessible on the device.
What Does Exchange Account Mean?
An Exchange account refers to an email account that is hosted on a Microsoft Exchange server. It is typically associated with businesses, organizations, or educational institutions. Exchange accounts use the Exchange ActiveSync (EAS) protocol to facilitate the synchronization of emails, calendars, contacts, tasks, and other data across multiple devices, such as computers, smartphones, and tablets.
Users with Exchange accounts can access their emails and collaborate with colleagues using features like shared calendars and address books. The Exchange account is often managed and administered by the organization’s IT department, providing additional security and management capabilities for corporate email communications.
Can I Delete Exchange Services App?
Disabling the Exchange app on your Android phone could lead to device instability and reduced battery performance. Deleting the app completely may not be feasible, especially if you rely on Exchange for business tasks and contact synchronization.
To remove the app from your phone, navigate to Settings > Apps, search for “Exchange,” and disable or uninstall it. Additionally, you can explore a list of applications compatible with Exchange for alternative options.
Will you find an error if you delete the Exchange Services app?
Deleting the Exchange Services app or the SMSRelayService process on Android devices with custom ROMs generally causes no issues for most users. However, a small number of users have reported an error notification stating ‘exchange services have stopped working’ when accessing the e-Mail application after deletion. Despite the notification, receiving emails through the application remains unaffected, so this should not cause significant concern.
How to disable or permanently uninstall the Exchange Services app?
The Exchange Services app is a system app on Android devices, and as such, it is not designed to be easily disabled or uninstalled by regular means. Disabling or uninstalling system apps may require root access, which can potentially void your device’s warranty and cause issues if not done correctly.
However, if you no longer wish to use the Exchange Services app or want to stop synchronization with your Exchange account, you can achieve this by removing the associated Exchange account from your device. Here’s how you can do it:
- Open the Settings App: Go to the “Settings” app on your Android device.
- Accounts: Look for and tap on the “Accounts” or “Accounts and Backup” option.
- Select Exchange Account: Find your Exchange account from the list of accounts connected to your device. Tap on it to access its settings.
- Remove Account: Once in the account settings, look for an option like “Remove account” or “Delete account.” The wording may vary based on your Android device’s manufacturer and software version. Tap on this option to remove the Exchange account.
- Confirmation: Confirm the action when prompted, and your Exchange account will be removed from your device. Any associated data (emails, calendars, contacts, etc.) will no longer be accessible on the device.
Please note that removing an Exchange account from your device will only affect the data on the device itself. The data will still be available on the Exchange server, and if you add the account back to the device in the future, the data will be synced again.
How to remove an Exchange Account in Microsoft Exchange email on Android?
To remove an Exchange Account in Microsoft Exchange email on Android, follow these steps:
- Open the Settings app on your Android device.
- Scroll down and tap on “Accounts” or “Users & accounts.”
- Find and tap on the Exchange account you want to remove.
- Tap on “Remove account” or “Delete account” and confirm the action when prompted.
How to stop the Exchange Service app from forwarding copies of messages?
To stop the Exchange Service app from forwarding copies of messages on your Android device:
- Access the settings of the app.
- Within the settings, locate the “Sync Settings” or “Email Sync” option.
- Disable the option that allows for forwarding copies of messages.
- Save these changes and the Exchange Service app will no longer forward any copies of your messages.
What Exchange services need to be running?
For proper functionality and synchronization with Microsoft Exchange servers, several services need to be running.
On the Exchange server side, key services include Microsoft Exchange Information Store for storing mailbox data, Microsoft Exchange Transport Service for email routing, and Microsoft Exchange Active Directory Topology Service for server communication.
On the client (device) side, Microsoft Exchange ActiveSync enables mobile devices to sync data, while Exchange Web Services facilitate communication over HTTP/HTTPS. Microsoft Outlook on desktops also utilizes various Exchange services.
Proper maintenance and monitoring of these services ensure the smooth operation of Exchange-based email systems.
Conclusion
In conclusion, the Exchange Services app on Android is a crucial tool for managing your email, calendar, and contacts efficiently. It allows you to sync and access your Microsoft Exchange account seamlessly on your Android device.
Whether you want to enable or disable the Exchange Services app, remove an Exchange account, or stop the app from forwarding copies of messages, we’ve provided a comprehensive guide to help you navigate through any issues or queries you may have.
Remember, it’s essential to understand the functionalities of the Exchange Services app and how it can enhance your productivity. If you need further assistance or have any more questions, feel free to reach out to our support team for prompt solutions.