Samsung Secret Codes [Updated] + PDF
Samsung phones are packed with hidden features and diagnostics accessible through secret codes. These special numeric codes unlock advanced options and provide access to internal tests not available through regular system settings. While novice users may be unaware of their existence, Samsung secret codes offer a treasure trove of tools for advanced users, technicians, and developers.
In this comprehensive guide, we will explore the most useful Samsung secret codes and how to use them to customize and troubleshoot your Galaxy device. Whether you want to check hardware diagnostics, view mobile network data, change device settings, or access developer options, these secret codes can prove invaluable. Read on to unlock the full potential of your Samsung phone!
What are Samsung secret codes?

Samsung secret codes consist of specific numeric combinations that enable users to access hidden settings and diagnostic menus on their Samsung Android devices. These codes are entered through the default dialer app and provide access to a range of functions, including hardware testing and diagnostic information retrieval. Typically used by advanced users and technicians, these secret codes unlock advanced settings not readily available through the standard system settings and user interface, aiding in the diagnosis and customization of Samsung devices.
Samsung Secret Codes for OneUI
We made a list of important secret codes for Samsung phones. You can use these codes on your Samsung Galaxy phone when you need them. Just be careful when using them.
Keep in mind that some of these codes might not work on your phone. It depends on the version of Android your phone has and when it was made. Older Android phones might accept some codes, while newer Galaxy phones might use different ones.
Secret code table for Galaxy devices
| Secret Code | Function | Use |
|---|---|---|
| *#06# | IMEI number | Check the IMEI number of the device. |
| *#07# | SAR Value | Check the Specific Absorption Rate (SAR) value of the device. |
| #0# | Test Hardware | Access hardware test menus for various components. |
| ##0## | Screen test | Perform a screen test to check for issues with the display. |
| *#0588# | Proximity Sensor | Test the proximity sensor on the device. |
| *#0589# | Light sensor test | Test the light sensor to check its functionality. |
| *#0808# | Change USB settings | Access options to change USB settings on the device. |
| *#0228# | Battery status | Check the battery status and related information. |
| *#0011# | GSM Network SIM Information | View information related to the GSM network and SIM card. |
| *#2222# | FTA Hardware Version | Display information about the FTA (Factory Test) hardware version. |
| ##4636## | Phone information | Access detailed phone information, including network, battery, and usage statistics. |
| *#1234# | Software Version | Check the software version of the device. |
| *#9090# | Diagnostic configuration Info | Access diagnostic configuration information. |
| *#2683662# | Advanced service mode | Enter advanced service mode for troubleshooting and testing. |
| *#9900# | SysDump mode | Access SysDump mode for system debugging and analysis. |
| #12580369# | Software & hardware info | Retrieve information about both software and hardware components. |
| *#0283# | Audio loopback | Test audio functionality by enabling audio loopback. |
| *#0842# | Vibration motor test | Test the device’s vibration motor to check if it’s functioning correctly. |
| *#34971539# | Camera Status & firmware | View camera status and firmware information. |
| #7465625*638# | Network lock keycode | Enter network lock keycode for unlocking the device. |
| *#2663# | TSP and TSK firmware update | Update the TSP (Touch Screen Panel) and TSK (Touch Screen Kernel) firmware. |
| #272IMEI# | Check Product code | Check the product code of the device. |
| #272IMEI# | Buyer code | Check the buyer code of the device. |
| #272IMEI# | Change device CSC | Change the device’s CSC (Customer Software Customization) code. |
| *#1111# | FTA Software version | Display information about the FTA (Factory Test) software version. |
| *43# [dial] | Call waiting | Activate or check call waiting status. |
| *135#[dial] | Own phone number | Check your own phone number. |
| 04[old Pin][new Pin]*[new Pin]# | Change SIM card PIN | Change the SIM card PIN. |
| #004[number]# | Call Divert | Activate call divert to a specific number. |
| *#004# | Call divert status | Check the status of call divert settings. |
| *#004# | Deactivate call divert | Deactivate call divert settings. |
| *#004# | Erase call diversion | Erase call divert settings. |
| ##786## | Refurbished check | Check if the device is refurbished. |
| ##7780## | Reset or Format the Phone | Reset or format the phone to factory settings. |
| *#22558463# | Reset total call time | Reset the total call time counter. |
| 135#[dial] | Check own phone number | Check your own phone number. |
*#06# : Check IMEI, MEID, & Serial Number
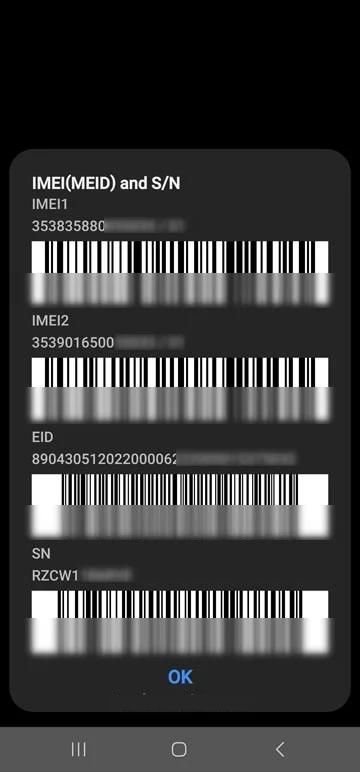
To check the IMEI number on a Samsung phone, you can use this code *#06#.
Simply dial this code on your Samsung device’s keypad, and it will display the IMEI (International Mobile Equipment Identity) number, which is a unique identifier for your phone.
*#07* : Check SAR Level
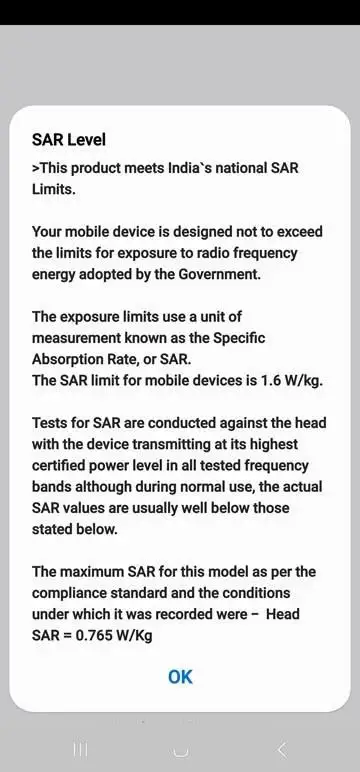
To check the SAR (Specific Absorption Rate) value on a Samsung phone, you can use this code *#07#.
Dial this code on your Samsung device’s keypad, and it will display the SAR value, which indicates the amount of radio frequency (RF) energy absorbed by the body when using the phone. SAR values are measured in watts per kilogram (W/kg) and are used to assess the safety of mobile devices in terms of their RF exposure levels.
*#0*# : Samsung Hardware Diagnostic Test Menu
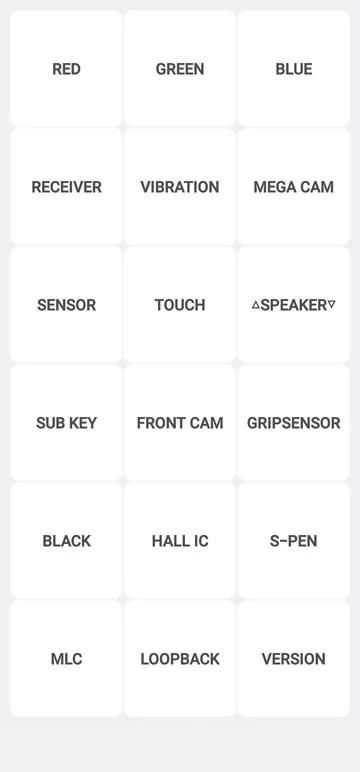
The Samsung Hardware Diagnostic Test Menu, accessible via the Samsung mobile check code #0#, serves as a vital tool to evaluate and verify the functionality of various essential features on your Samsung smartphone, including screen touch, microphone, display colors, Bluetooth, battery, sensors, camera, speaker, and network. Whether you’re buying a used phone or simply want to ensure your device’s performance, this code allows you to thoroughly test and assess its functions.
*#1234# : Check AP, CP, CSC Version, & Model Number
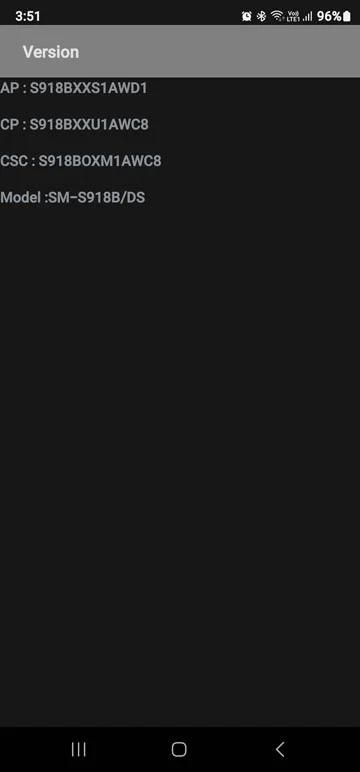
If you’ve recently purchased a new Samsung mobile phone from a physical retail store and wish to ascertain its precise model number, you can do so by dialing this short code *#1234#.
*#0808# : Access Samsung USB Settings
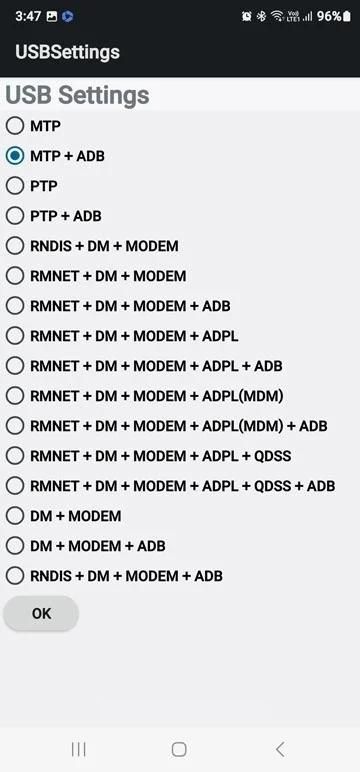
By default, Samsung Galaxy devices are set to connect to computers using MTP (Mobile Transfer Protocol) and ADB (Android Debug Bridge) modes via USB. You can access the USB Settings page by dialing *#0808# on your phone, giving you the ability to modify how your device interacts when connected via USB.
These settings allow you to customize the drivers that are enabled during the connection and choose which features are active when your Samsung phone is linked to your PC using a USB cable. These features encompass MTP, ADB, PTP (Picture Transfer Protocol), DM (Diagnostic Mode), MODEM (Modulator-Demodulator), RNDIS (Remote Network Driver Interface Specification), RMNET, and more.
*#2683662# : Access Samsung Service Mode
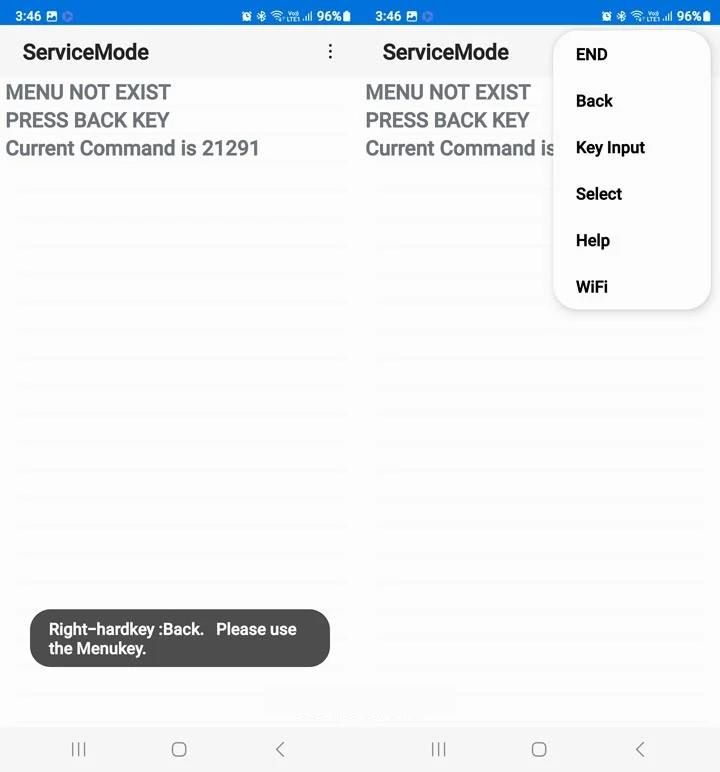
To enter Samsung’s Advanced Service Mode, employ the *#2683662# secret code, which is primarily intended for use by engineers and technicians. This specialized mode grants access to advanced diagnostic and service features on Samsung devices, allowing professionals to troubleshoot and fine-tune various aspects of the device’s performance.
*#0011# : Display SIM Information
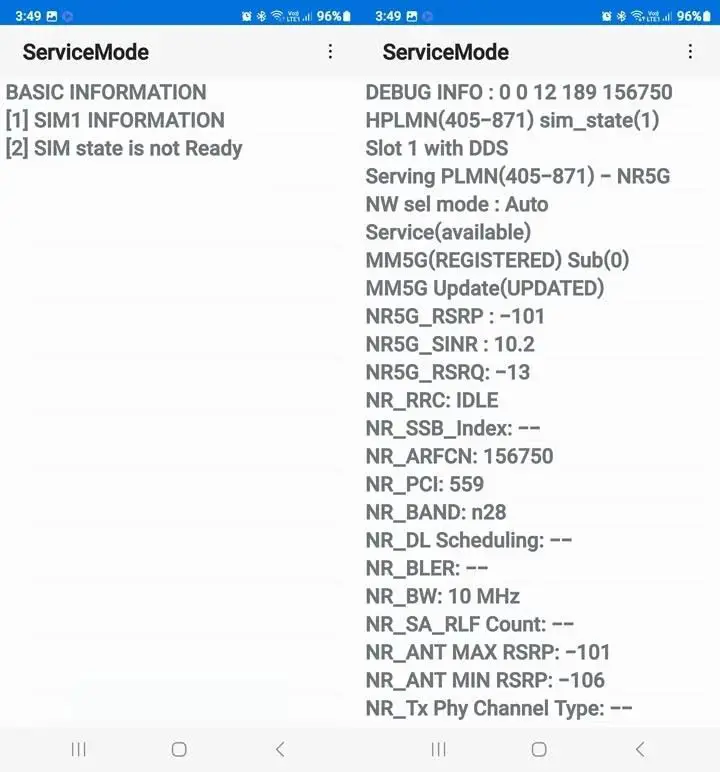
By entering this specific code *#0011# on your Samsung device, you gain access to a section within the Service Mode that provides detailed technical insights into your SIM card and network-related information. This includes valuable data about your SIM card’s configuration as well as the strength and setup of your network signal, allowing you to check and potentially troubleshoot aspects related to your mobile connectivity and SIM card functionality.
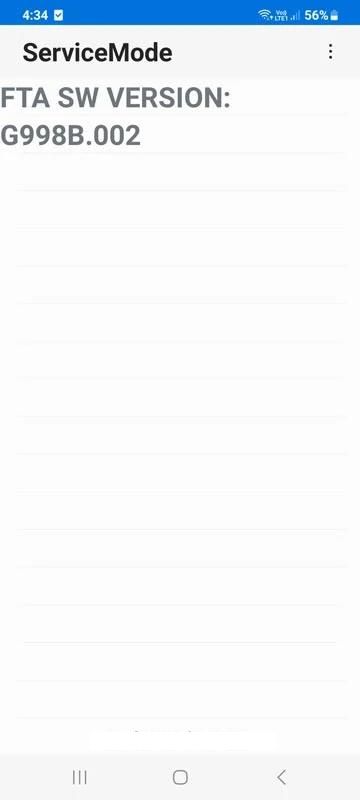
*#1111# : Check FTA Software Version

You can explore an additional facet of the Service mode by dialing *#1111# on your Samsung device, which enables you to examine the FTA software version. This particular software version reveals the number of times your Samsung device has undergone firmware flashing.
For instance, if it has only been flashed once, typically by the OEM (Original Equipment Manufacturer), it will display as “001” along with the model number of your device. For instance, the FTA software version of my new Galaxy S23 Ultra (SM-S918B) is “S918B.001,” indicating a single OEM firmware flash.
Conversely, on my Galaxy S1 Ultra (SM-G998B) device, which I’ve flashed with Samsung firmware once using Odin, the FTA software version changes to “G998B.002,” reflecting the additional flashing.
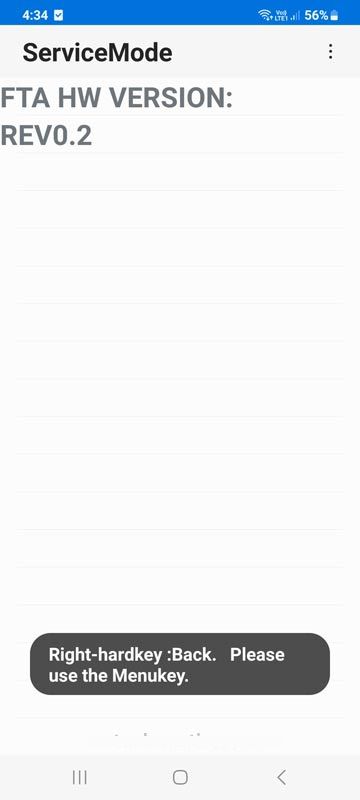
*#2222# : Check FTA Hardware Revision Version
To ascertain the FTA hardware revision version of your Samsung device, simply input the *#2222# secret code. This code provides insights into the number of hardware alterations or replacements that have taken place on the device.
In instances where no hardware changes have occurred, such as my S23 Ultra, the FTA HW version remains as “REV0.0.” Conversely, my S21 Ultra, which has undergone two service center visits resulting in hardware adjustments, displays a HW version revision value of “0.2.” This feature is particularly useful for tracking and documenting any hardware modifications made to your Samsung device.
*#9090# : Check Diagnostic Configuration
*#9090# reveals the diagnostic configuration of your Samsung device, allowing engineers to manipulate the internal MUX that governs diagnostic debug output, switching it between USB and UART interfaces as needed.
*#9900# : Access Samsung SysDump Mode
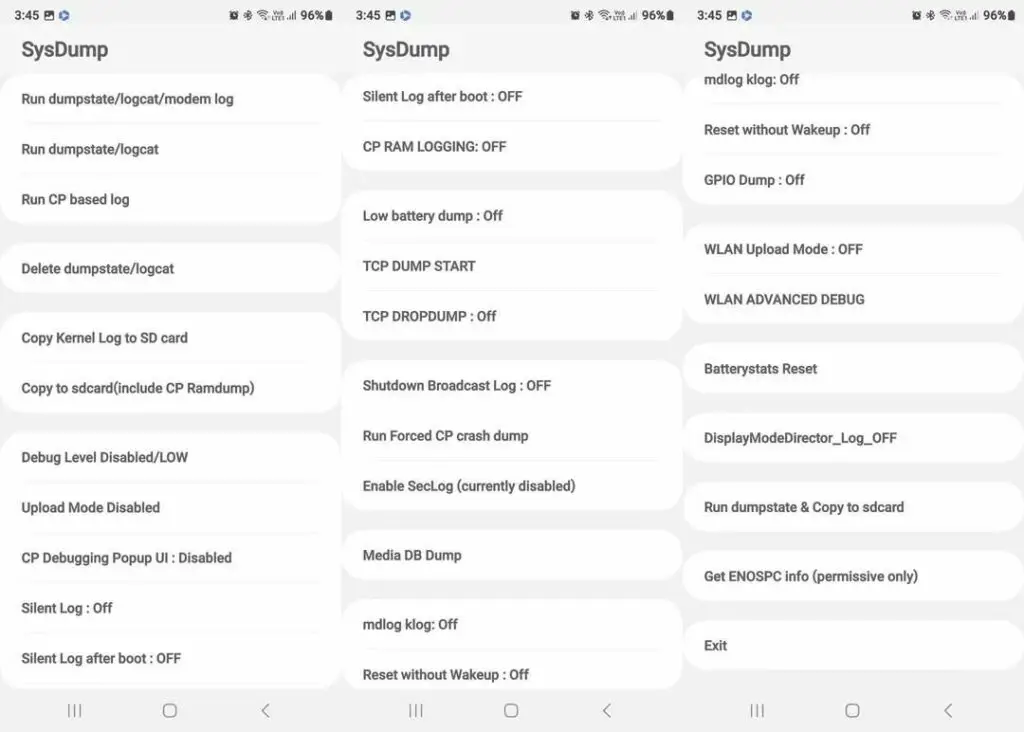
*#9900# is a highly significant Samsung secret code that initiates SysDump mode, facilitating the creation of diverse system dumps and the modification of various logging functions, making it a crucial tool for device analysis and debugging.
*#272*IMEI # : Change the CSC of Samsung Devices
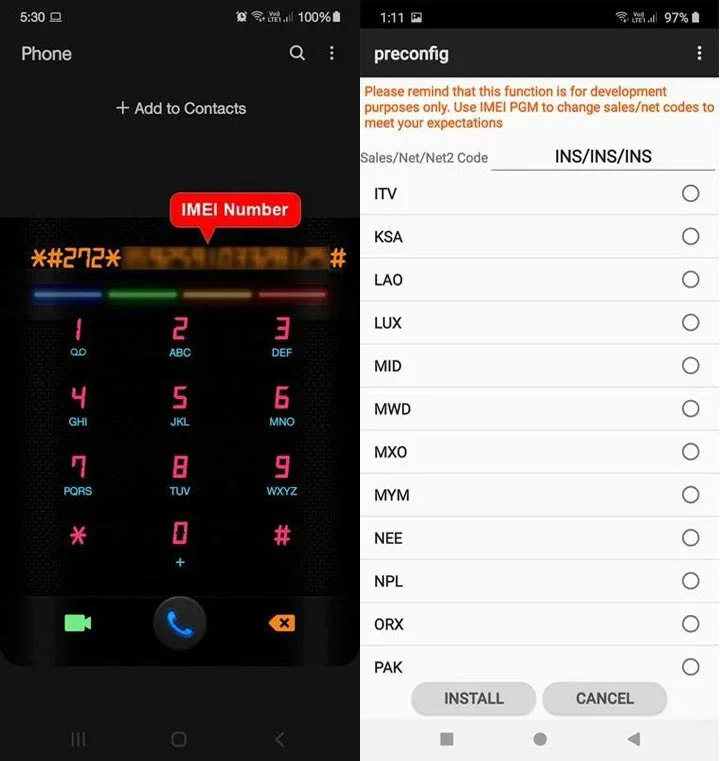
This secret code allows you to modify the OS and apply CSC (Country-Specific Customization) on your Samsung phone. Simply input the code, choose your desired CSC from the available options, and click on the Install button. It’s essential to note that changing the CSC will result in a phone reset and the deletion of all data, so exercise caution.
*#12580*369# : Check Software and Hardware Information
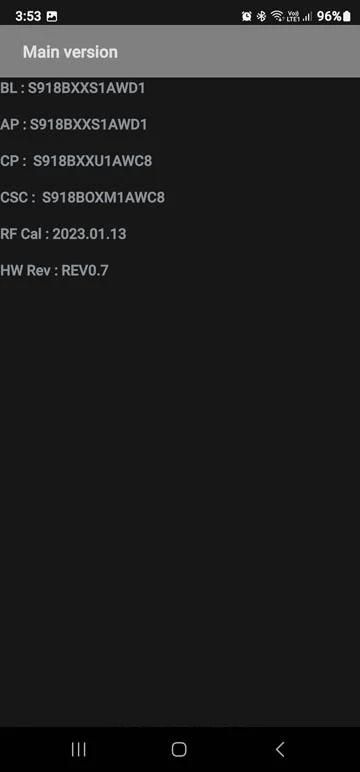
This code *#12580*369# reveals detailed software version information on your Samsung phone, including BL, AP, CP, and CSC versions. Additionally, it provides insight into your device’s manufacturing date, with the date alongside “RF Cal” signifying the manufacturing date.
RF Cal, short for Radio Frequency Calibration, pertains to the calibration of various hardware components like gyro sensors, proximity sensors, magnetometers, antennae, and radio chips during the assembly of a smartphone. Typically, this RF Cal date corresponds to the device’s manufacturing date, as it occurs once the manufacturing process is completed.
*#0283# : Check the Audio Loopback Control
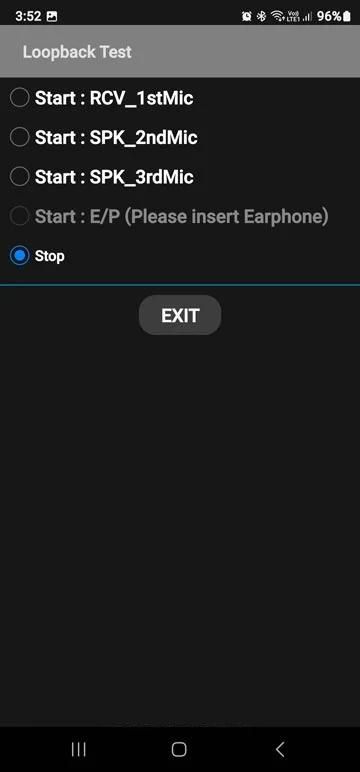
This code *#0283# allows you to assess both the phone’s speakers and microphone, as well as the speakers of any connected earphones.
*#34971539# : Check Camera Status and Firmware Version
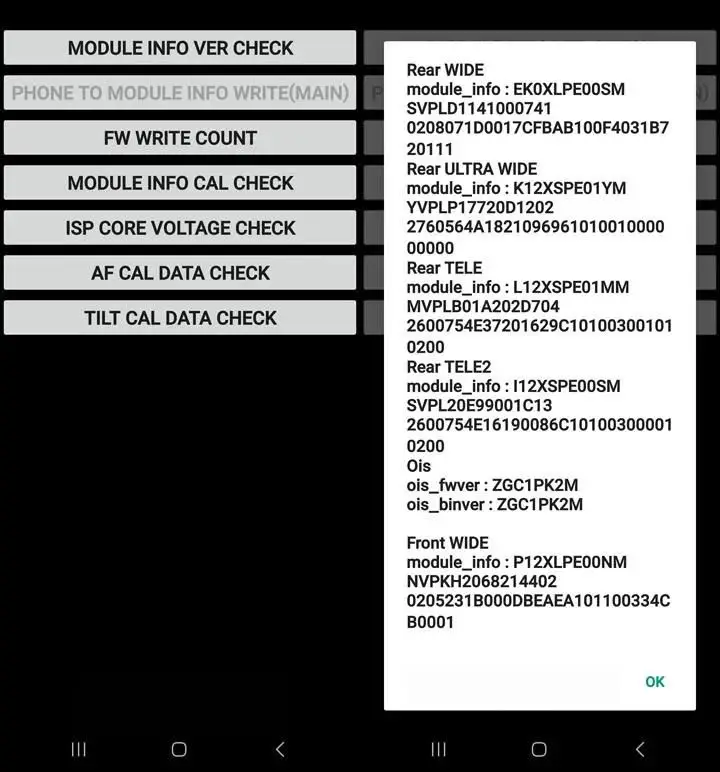
This Samsung code *#34971539# serves as a diagnostic tool to verify the functionality of all camera modules on your phone and inspect the camera firmware version for each module.
*#2663# : Check TSP, WiFi, & Bluetooth Firmware Version
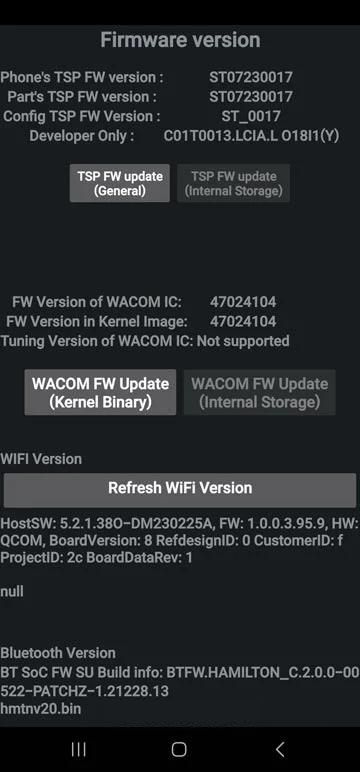
This code *#2663# enables you to inspect and potentially update the firmware version of the TSP (Touch Screen Panel), which governs the behavior of your Samsung phone or tablet’s touchscreen.
If you encounter issues like unresponsiveness, input delays, or malfunctioning, you can initiate a touch screen firmware update by selecting the “TSP FW update (General)” option. It’s crucial to note that this option should only be used when the touchscreen is not functioning correctly.
Additionally, you can access information about the firmware versions for WACOM, WiFi, and Bluetooth on your Samsung device.
*#*#7780#*#* : Reset or Format Your Device
You can use the code ##7780## to perform a reset or format on your Samsung device. This code initiates a reset to the factory state, erasing all settings, third-party apps, app data, as well as media and document files from your Android device.
*#22558463# : Reset Total Call Time
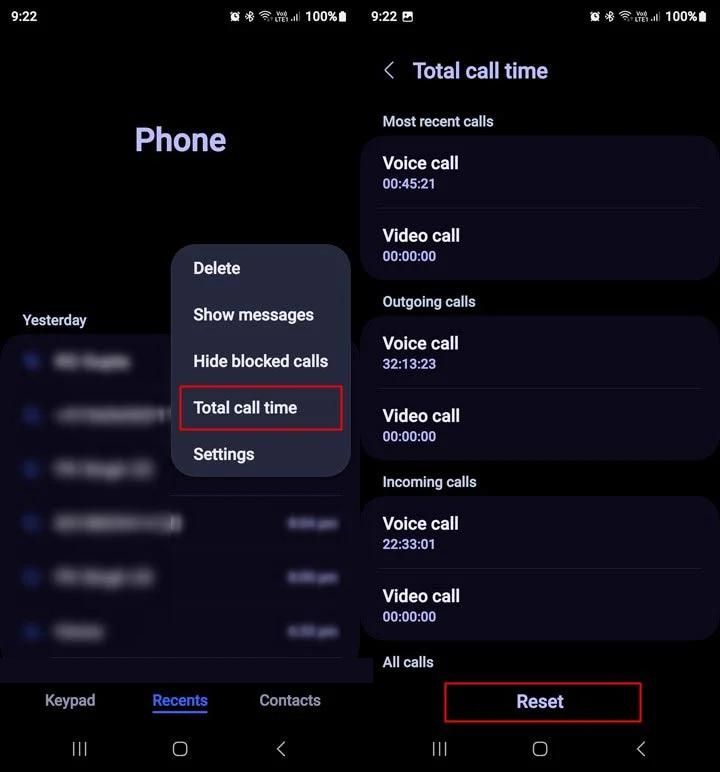
You can reset the total call time counter on Samsung devices using the Phone app. Alternatively, you can achieve the same by dialing *#22558463# on your device.
*135#[dial] : Request Your Own Phone Number
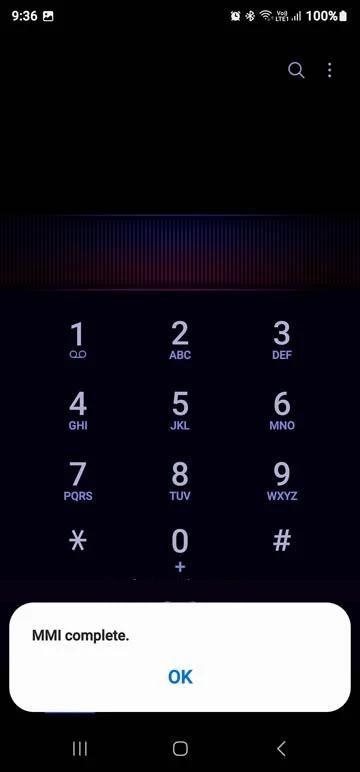
Forgotten your own phone number? You can use this MMI code to request your phone number. Keep in mind that this code may not work every time, so you might need to attempt it multiple times.
**04*[old Pin]*[new Pin]*[new Pin]# : Change SIM Card PIN
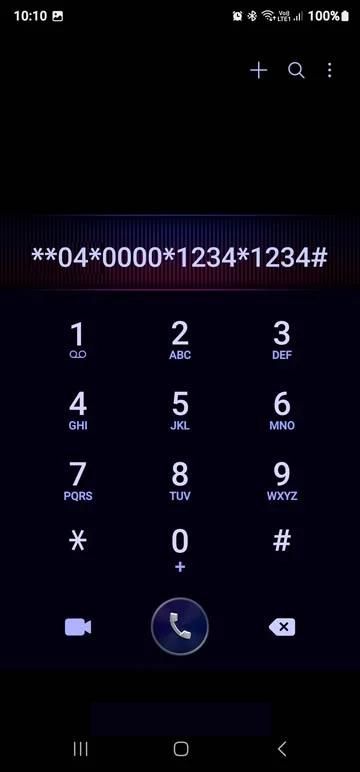
Changing the SIM card lock PIN on your Samsung device can be done through Settings > Security and privacy > Other security settings > Set up SIM card lock.
Alternatively, there’s a secret code you can use, provided you know your old PIN or the default SIM card PIN. Simply input the code in the following format: *04000012341234#, where ‘0000‘ represents the old PIN and ‘1234‘ is the new PIN you wish to set.
Secret Codes for Samsung Phones Running One UI
| Samsung Secret Code (One UI) | Secret Code Function | Use |
|---|---|---|
| *#0228# | Check battery status ADC, RSSI | Check battery status, ADC, RSSI reading, and other information. |
| *#011# | Display network and cell info | Displays network connection and cell-related information. |
| *#0283# | Check audio loopback control | Check and control audio loopback functionality. |
| #7465625638*# | Check network lock keycode | Check the network lock keycode for unlocking the device. |
| *#2663# | Check TSP and TSK firmware | Check TSP (Touch Screen Panel) and TSK (Touch Screen Kernel) firmware update status. |
| *43# [dial] | Enable call waiting | Activate call waiting for incoming calls. |
| #43#[dial] | Turn off call waiting | Deactivate call waiting for incoming calls. |
| *#43#[dial] | Show call waiting status | Check the status of call waiting for incoming calls. |
| *135#[dial] | Request your phone number | Attempt to display your own phone number (may not always work). |
| #004[number]# | Divert call to a given number | Divert incoming calls to the specified phone number. |
| *#004# | Request call diversion status | Check the status of call diversion settings. |
| #004# | Deactivate call diversion | Deactivate call diversion settings. |
| ##004# | Erase call diversion | Erase call diversion settings. |
| ##4636##* | Diagnostic and settings mode | Access diagnostic and general settings mode. |
| ##1472365## | GPS test settings | Access settings for testing GPS functionality. |
| *#272886# | Auto answer selection | Set auto-answer options. |
| #2732832553282# | Data create menu | Access the data create menu. |
| #273283255663282# | Data create SD card | Create data on the SD card. |
| *#3214789650# | LBS test mode | Enter LBS (Location-Based Services) test mode. |
| *#32489# | Ciphering info | Check ciphering information. |
| *#44336# | Software version info | View software version information. |
| *#872564# | USB logging control | Control USB logging settings. |
| 27674387264636# | Display product code | Display the product code of the device. |
Secret Code Function
Accessing the Secret Diagnostic Menu
Before proceeding, it’s essential to acknowledge that this feature may not be accessible on all devices. Some carriers, notably Verizon and Sprint, have been known to block the code-based diagnostic mode on Samsung smartphones and tablets. However, it appears that newer Sprint phones like the Galaxy S6 have this functionality restored.
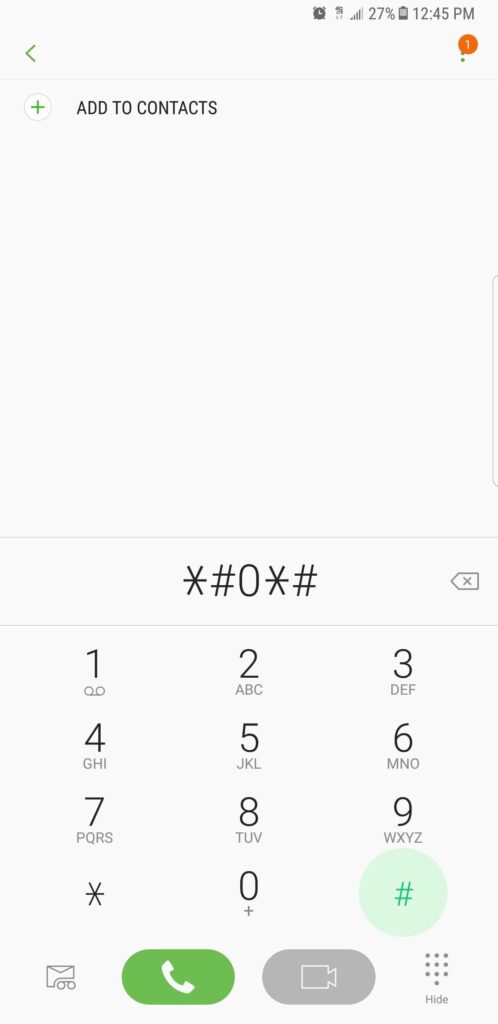
To initiate the process, simply open the phone app on your Samsung device. Then, enter #0# using the dial pad, and the phone will automatically enter its secret diagnostic mode. It’s worth noting that the process is self-triggering, so there’s no need to tap the green call button to execute the command. If you enter the code, and nothing happens, it indicates that the feature is disabled on your device.
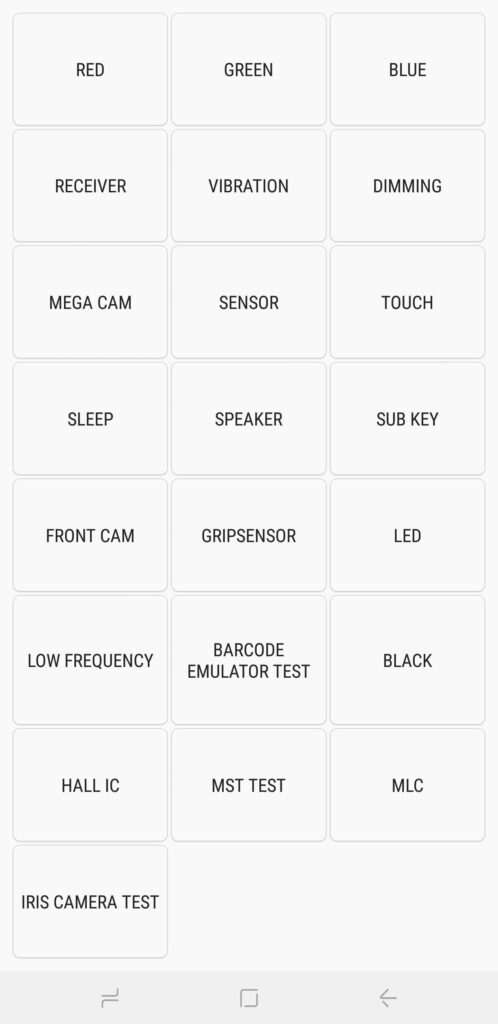
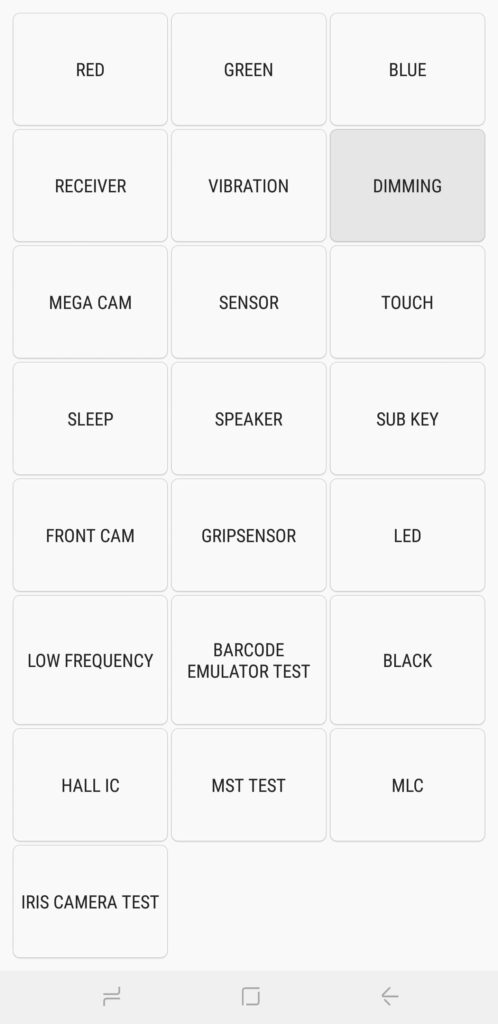
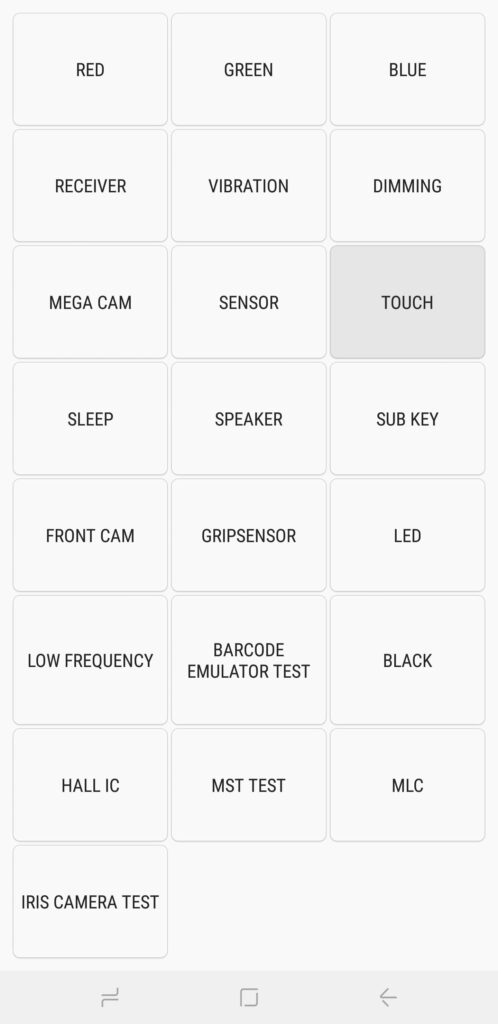
Here are the tests you can carry out on your Samsung device after inputting the code and accessing HwModuleTest mode. Please be aware that some tests may not have accompanying screenshots for security or test-specific reasons.
Red, Green & Blue Screens
Choosing any of these three tests examines your device’s red, green, and blue color spectrums, displaying the corresponding colors vividly when selected. To return to the main diagnostic page, simply tap the screen to exit.


Receiver & Vibration
To verify the functionality of your phone’s receiver, tap the “Receiver” button to initiate the test. This action will lead you to a white screen with an unmistakable dial tone. When you’re done, tap the back button twice to return to the main test page.
For the “Vibration” test, it assesses your phone’s vibration motor. Upon tapping the “Vibration” button, your screen will turn black, accompanied by a continuous vibration. Simply tap the screen once to exit the test and return to the main testing screen.
Dimming
Selecting “Dimming” will lead you to a screen displaying red, green, and blue colors. This screen will cycle between dimming and brightening each time you tap it. To return to the main test page, simply press the volume up button.

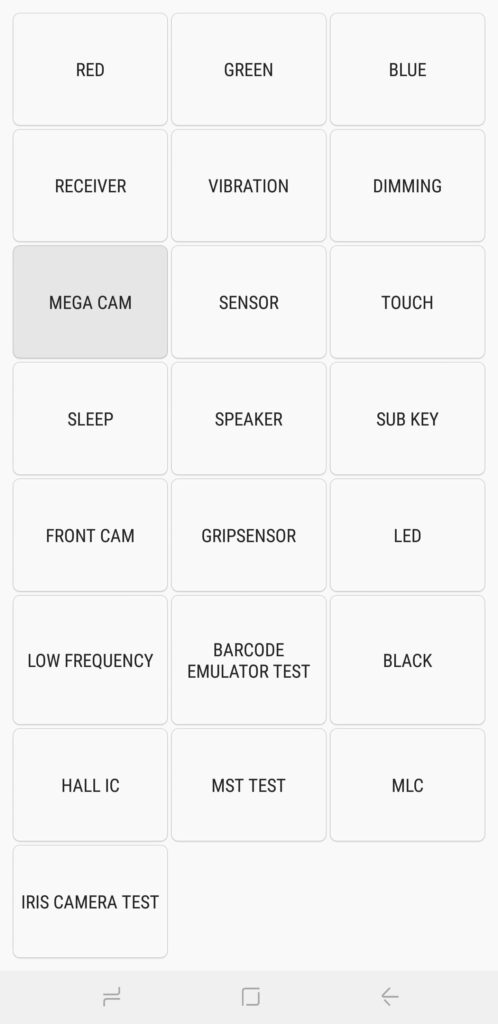
Mega Cam
To assess your main camera, tap “Mega Cam.” Use the volume buttons to zoom in and out, then utilize the camera button at the screen’s bottom to capture a photo. Keep in mind that the flash is enabled by default, and the test photo will be saved in your gallery. When you’ve completed the camera test, tap the back button to return to the main diagnostic screen.

Sensor
Selecting the “Sensor” button will lead you to a test page for various sensors, including the accelerometer, proximity sensor, barometer, light sensor, gyroscope, magnetic sensor, HRM, and fingerprint scanner. Each of these eight submenus will be discussed individually in the following sections.
Accelerometer
Accelerometers are essential sensors responsible for detecting your phone’s orientation and measuring linear acceleration during movement. To assess its performance, select either “Image Test” to examine landscape-to-portrait transitions or “Graph” to evaluate the sensor’s responsiveness by shaking your device vertically.
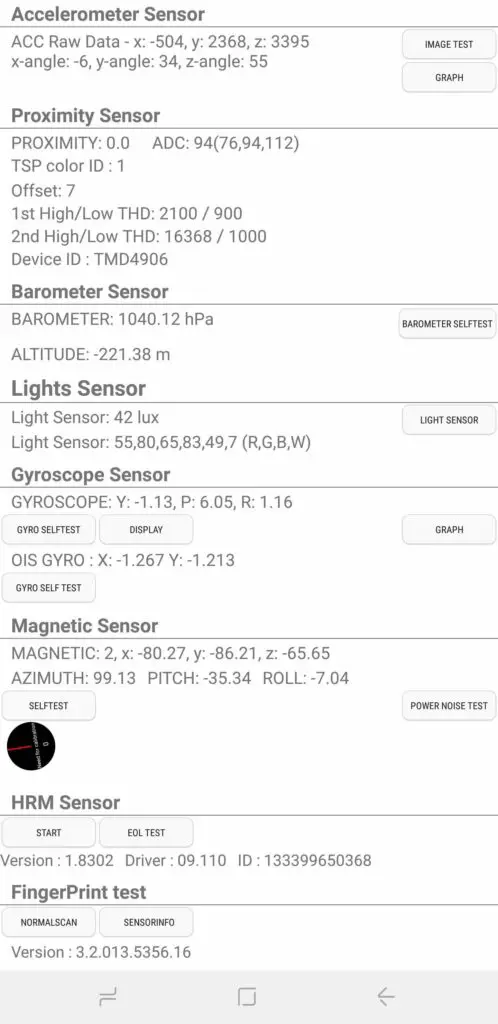

Proximity Sensor
This evaluates your device’s proximity sensor, which plays a crucial role in turning off your screen during phone calls when the phone is close to your face to prevent unintended touches. To check this functionality, just place your hand over the top of your phone. If the proximity sensor is operational, the screen will turn green; uncover the screen to return it to white and proceed to the next test.

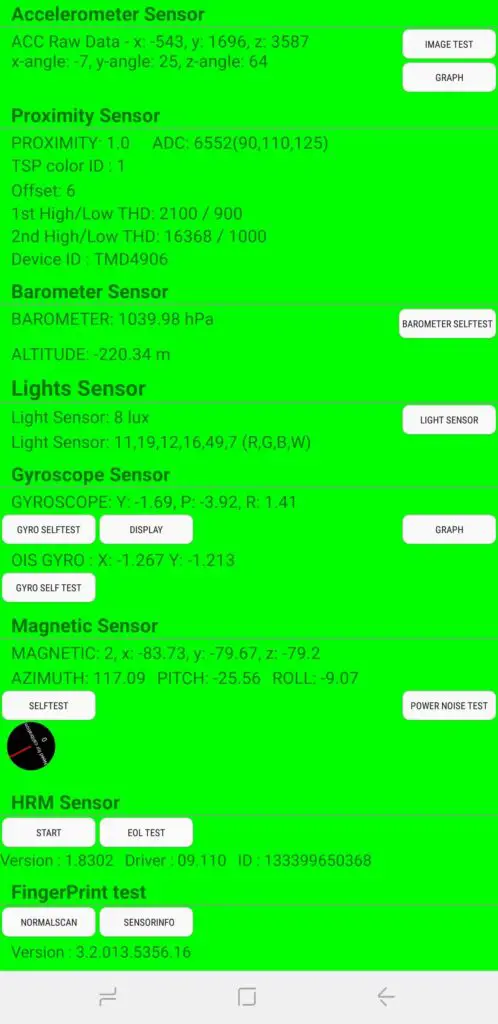
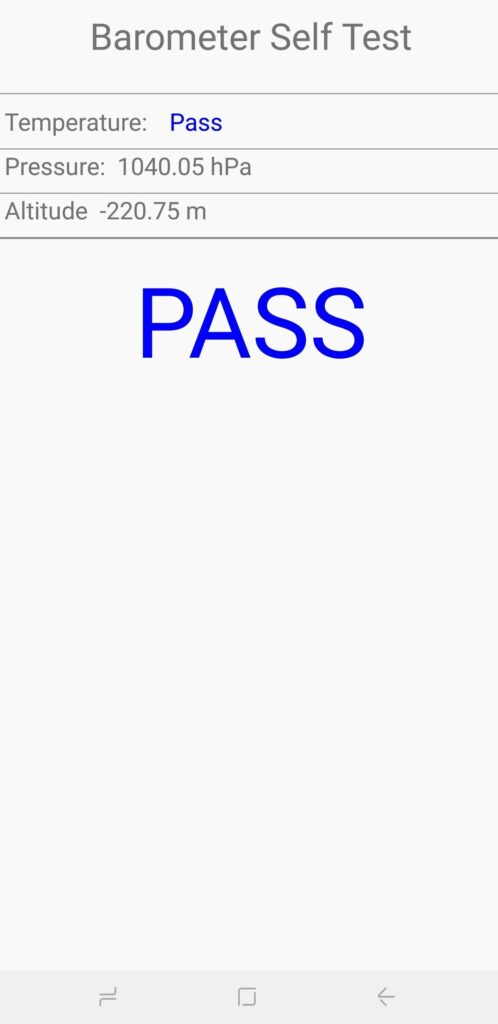
Barometer
The barometer sensor primarily tracks altitude, contributing to more precise GPS readings. Testing this function is straightforward; tap “Barometer Selftest” to launch an automated test that provides an immediate assessment of its functionality.

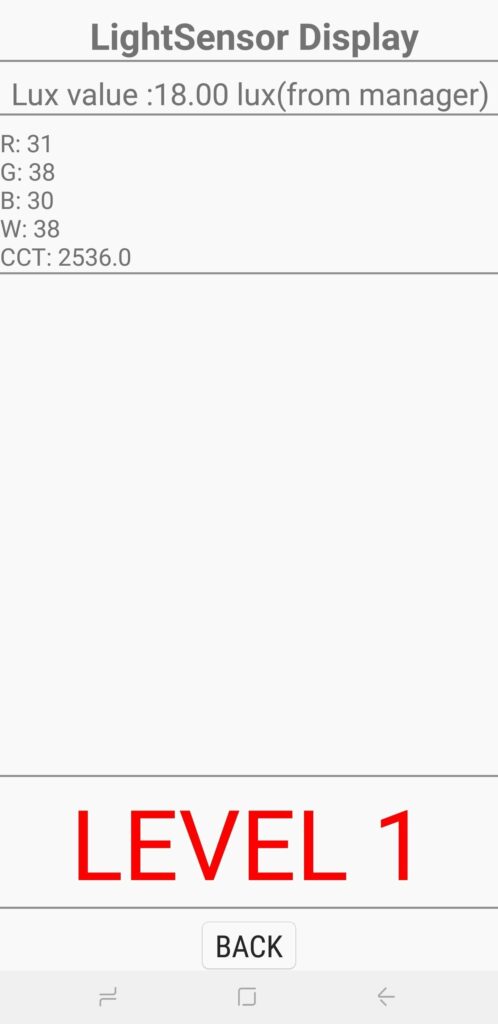
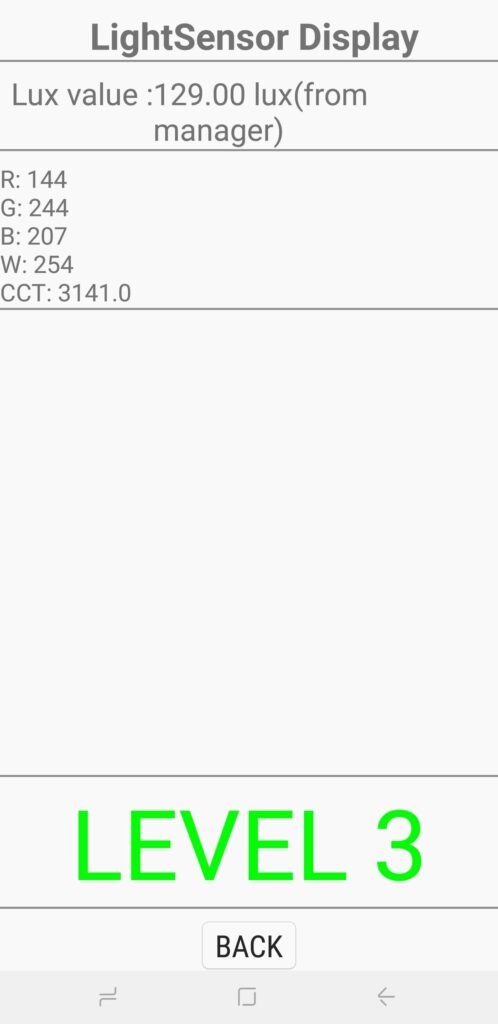
Light Sensor
The light sensor, as its name implies, is responsible for detecting ambient light levels. To conduct the test, select “Light Sensor,” and then expose your phone to varying levels of brightness. The sensor should register three levels sequentially, starting from “Level 1” for dim lighting, progressing to “Level 2” for moderate brightness, and culminating in “Level 3” for extremely bright conditions.

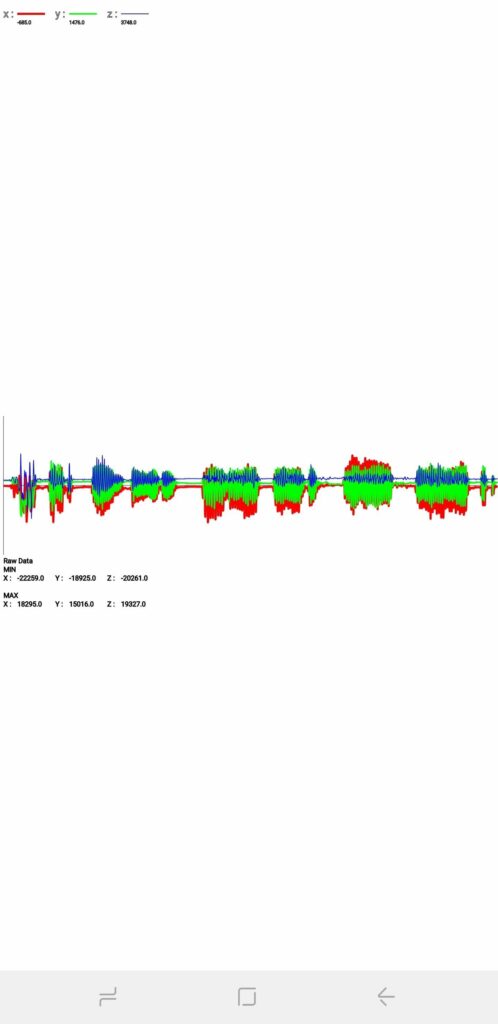
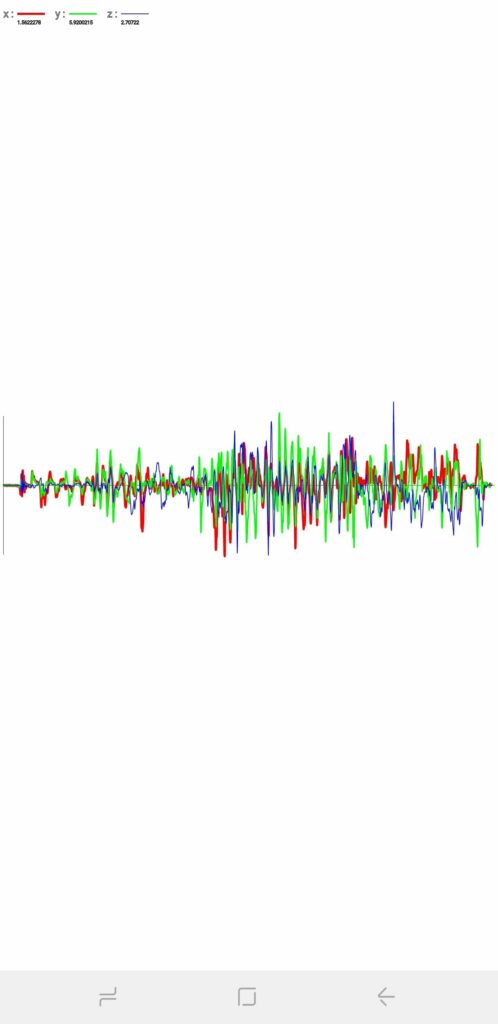
Gyroscope
The gyroscope is responsible for measuring your device’s rotation and complements the accelerometer to provide a comprehensive overview of movement. You can evaluate your handset’s gyroscope in multiple ways. You can initiate a manual test by tapping either “Display” or “Graph,” or simply rotate your phone to observe the corresponding results displayed as numerical values or represented graphically in a linear graph.
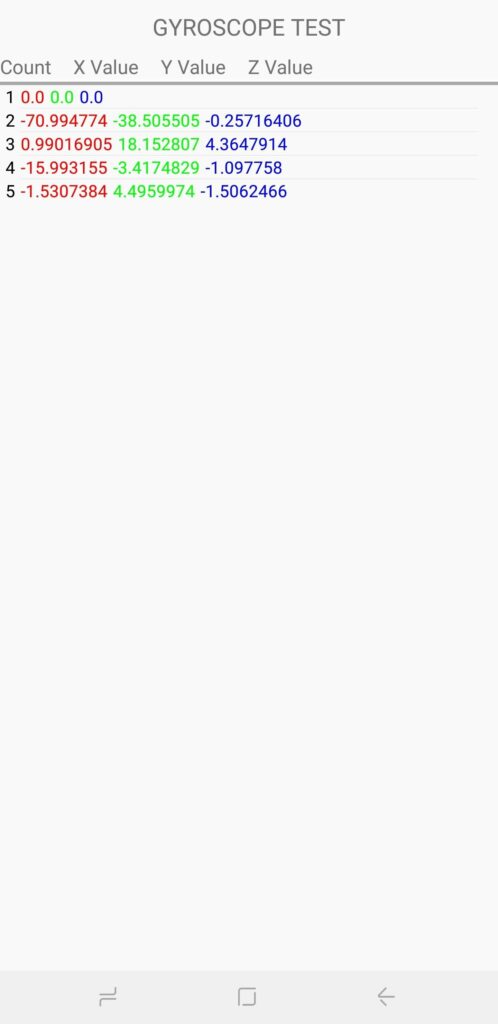
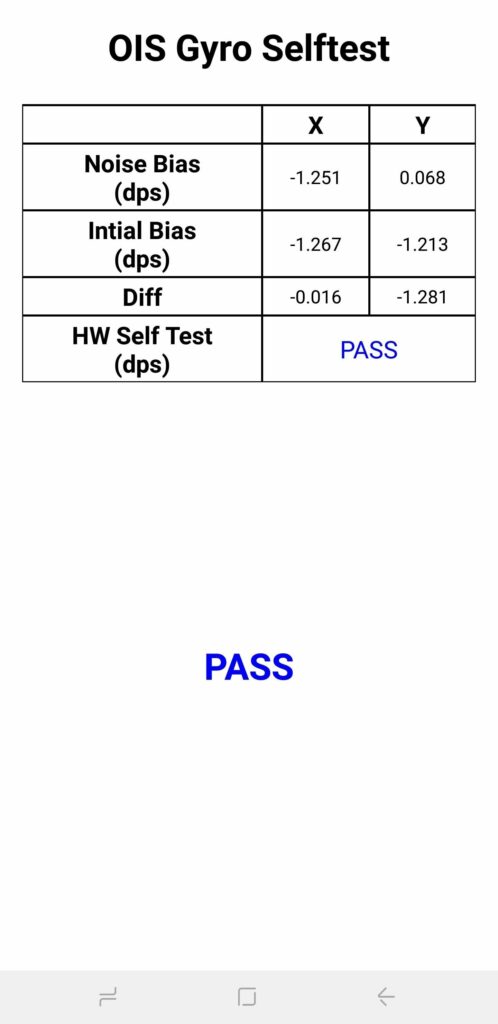
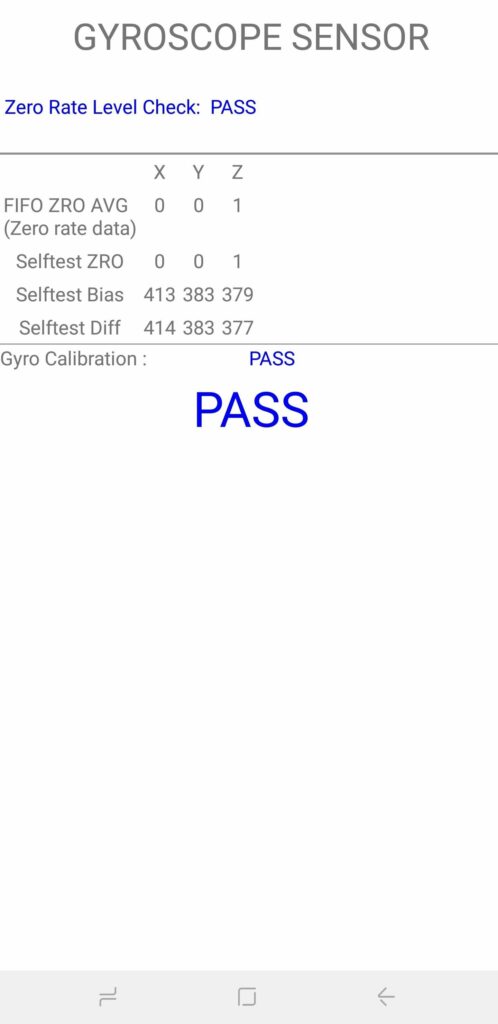
Alternatively, you have the option to automatically test your device’s gyroscope functionality by choosing “Gyro Selftest” for both the x and y axes.
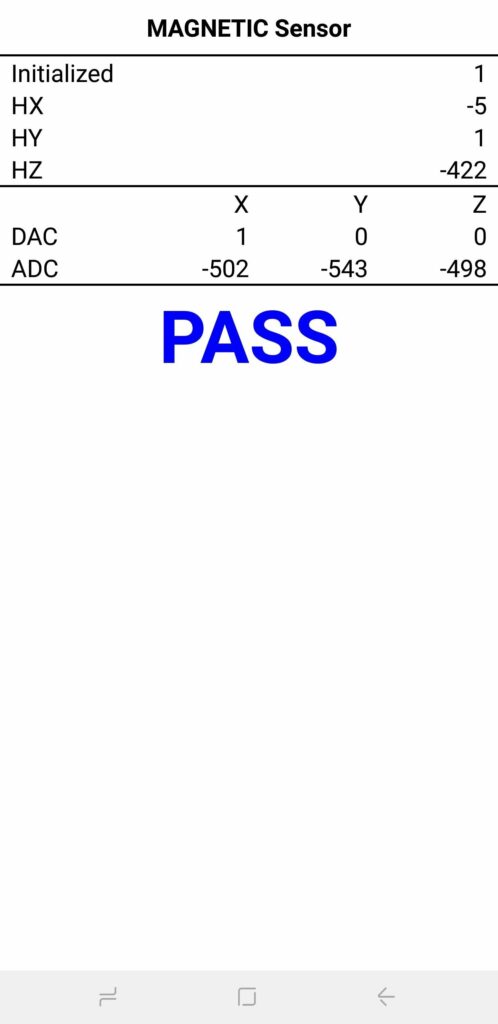
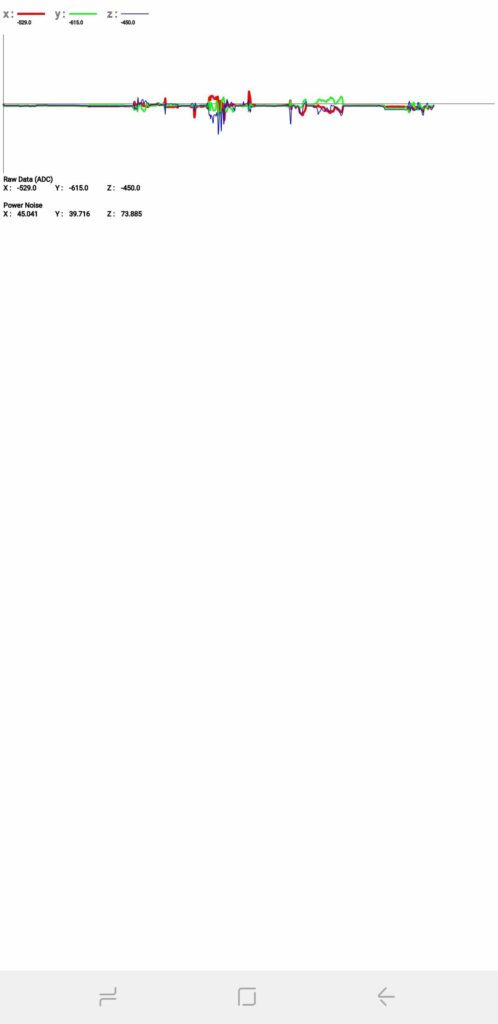
Magnetic Sensor
This assesses the functionality of your device’s magnetic sensor. By selecting “Selftest,” an automatic test is initiated to determine whether your device passes or fails. Alternatively, for manual testing, tap on “Power Noise Test,” and then move a magnet around your phone.
For instance, on the S8, the magnetic sensor is positioned in the top-left corner of the phone, as indicated by the appearance of magnetic spikes on the graph when a magnet is brought close to that area.
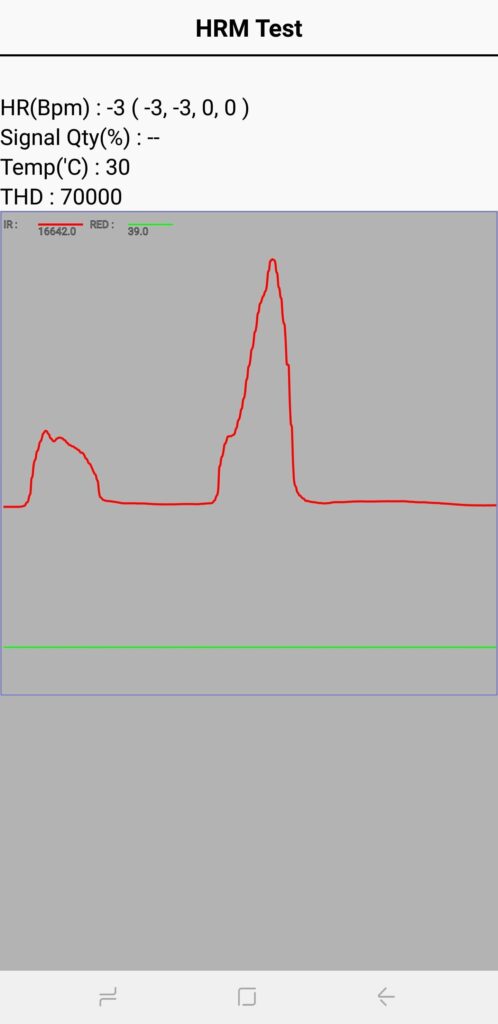
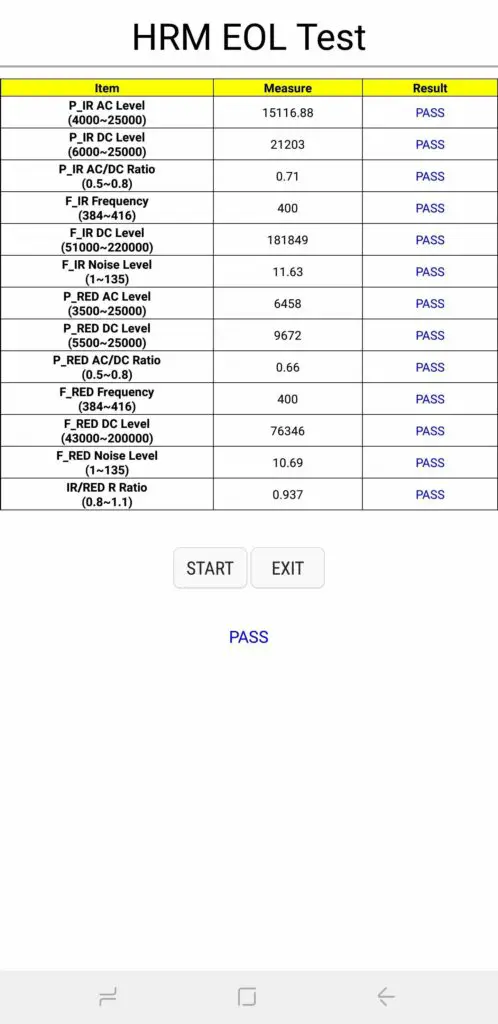
HRM
This evaluates your smartphone’s heart rate monitor and can be conducted in two methods.
First, within the “HRM” tab, tapping the “Start” button will direct you to the “HRM Test” page, where you can test your device’s heart rate monitor by placing your finger on the sensor.
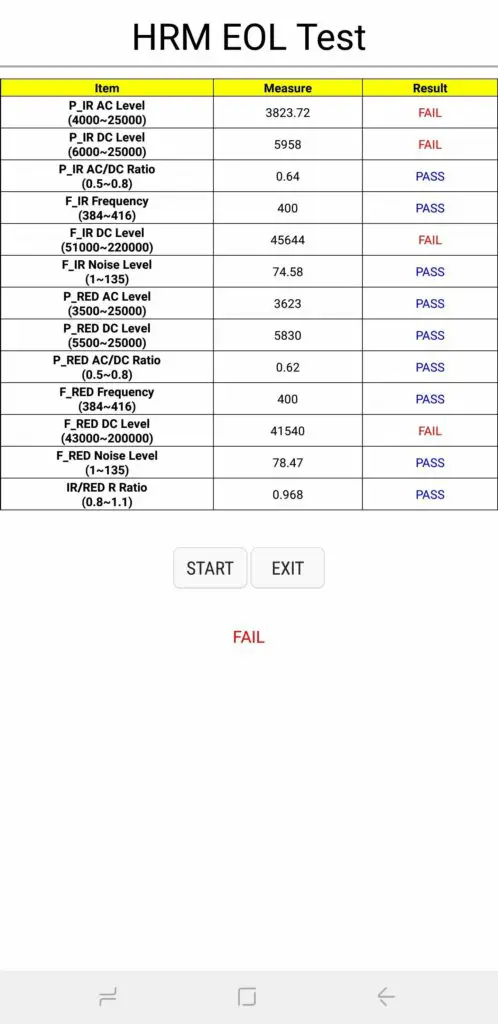
If you wish to perform the “HRM EOL” test, ensure your phone is placed on a flat surface and remains perfectly still; any movement may result in multiple failures.
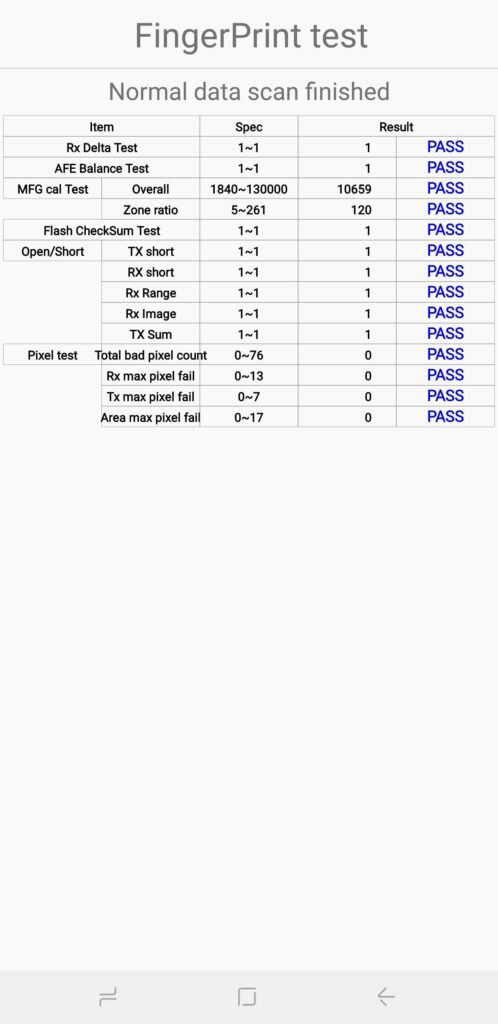
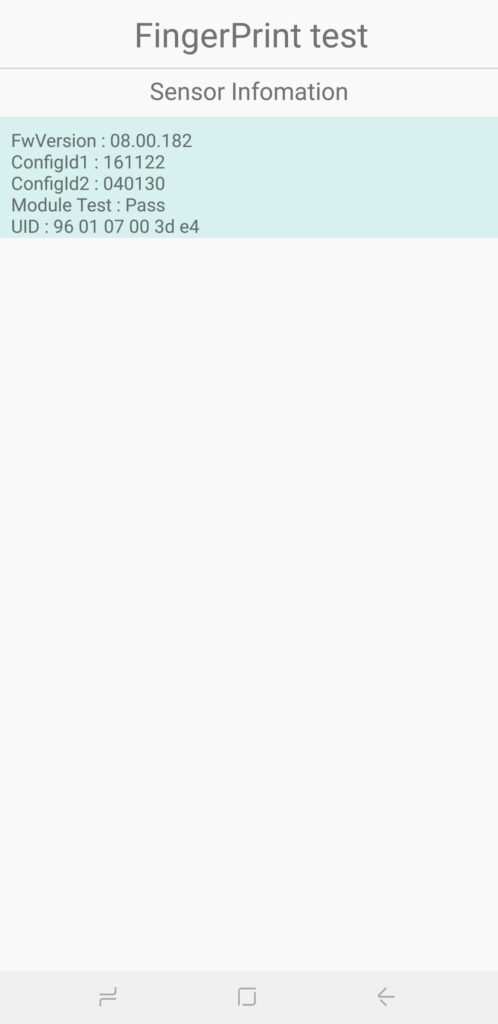
Fingerprint Sensor
This assesses your fingerprint scanner. To begin testing, tap “Normal Scan,” and the evaluation will automatically verify the proper functioning of all components. Alternatively, selecting “Sensor Information” provides access to details such as firmware versions for your review.
Touch
Your phone’s touchscreen is arguably its most crucial component for accessing and interacting with your device. To assess this functionality and detect any dead zones, tap the “Touch” button to initiate the test. Trace the squares on the screen to complete the X-marked box, which should turn green upon successful completion. Once finished, you will be automatically redirected to the main test page. Alternatively, you can return to the main test page by pressing the volume up button.


Sleep & Speaker
To assess your device’s sleep functionality, tap the “Sleep” button, which should promptly put your phone into sleep mode. Once completed, wake your phone using the usual method, and you will be automatically returned to the primary diagnostic page.
For testing your handset’s audio output, tap the “Speaker” button, which will play a sample song for you to listen to. Once you’ve confirmed the speakers are working well, tap the “Speaker” button once more to conclude the test.
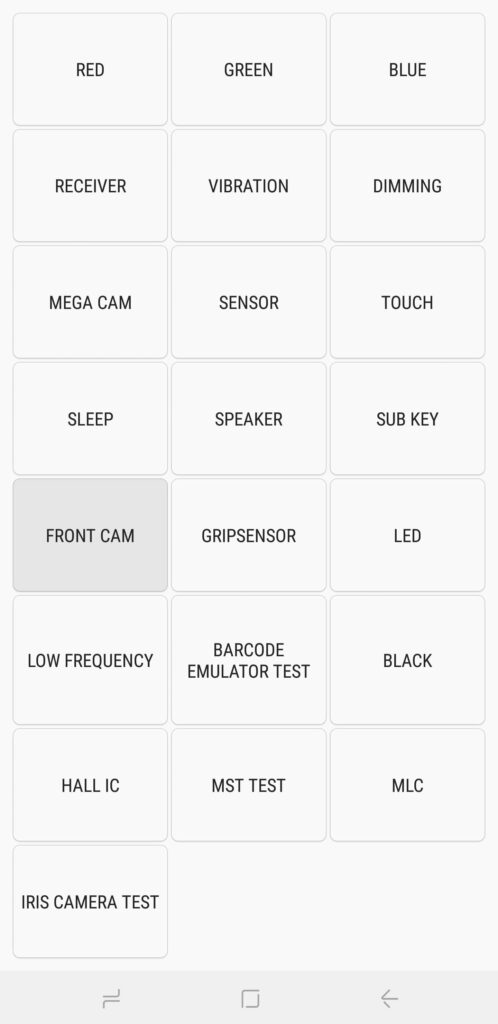
Front Cam
To evaluate your front camera, tap the “Front Cam” button, which will activate your front camera and allow you to take a selfie as usual. It’s important to note that any test photos you capture will be automatically saved in your device’s gallery, so remember to delete them if they were solely for testing purposes. Upon completing the selfie cam test, tap the back button twice to return to the main testing page.

Sub Key
“Sub Key” assesses the functionality of your hardware buttons, including the virtual home button if you own a Note 8 or S8. Pressing each button will alter the screen color, aiding in the verification of their performance. To return to the primary diagnostic page, simply tap the exit button located in the center of the screen.


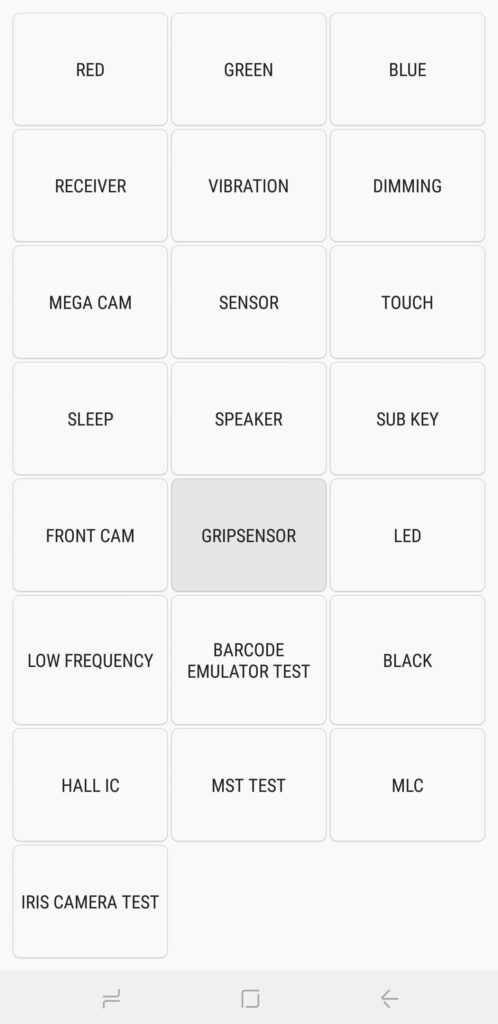
Gripsensor
It’s likely that your Samsung device is equipped with sensors designed to detect your grip. To assess this feature, tap the “Gripsensor” button and follow the prompts, releasing your grip as instructed.
If the grip sensor is working correctly, you should see a blue screen with the label “Working.” After completing the test, tap the back button twice to return to the main screen.


LED & Low Frequency
The LED test is designed to verify the functionality of your device’s LED notification light. To run this test, simply tap the “LED” button, and then tap the screen to cycle the LED’s color from red to green and finally to blue. A final tap on the screen will conclude the test and return you to the main diagnostics page.
For assessing your phone’s earpiece in the “Low Frequency” test, tap the corresponding button to initiate testing, leading you to the “Low Frequency Test” page. Here, tap on 100 Hz, 200 Hz, and 300 Hz, and position your ear against the phone’s earpiece each time you select a frequency to detect any low buzzing noise. After completing the tests, you can exit to the main diagnostics page by tapping the back button twice.
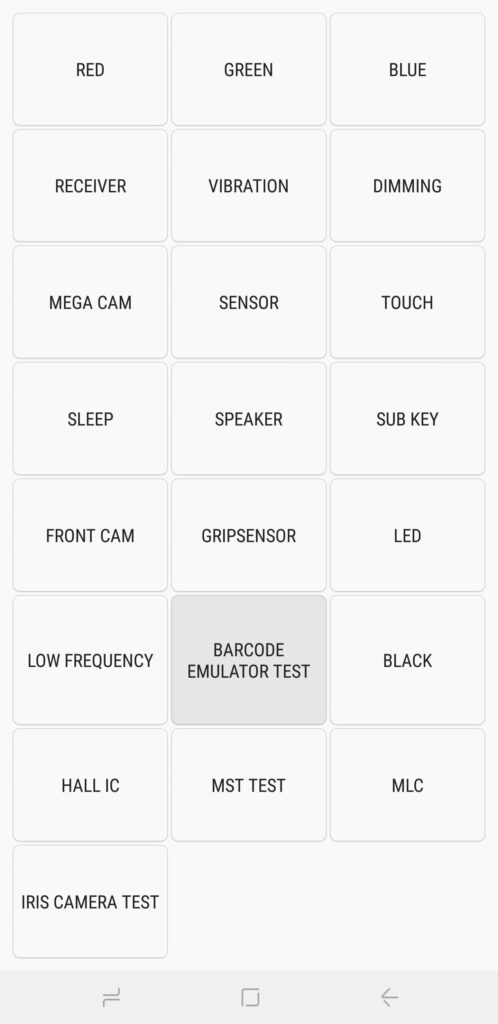
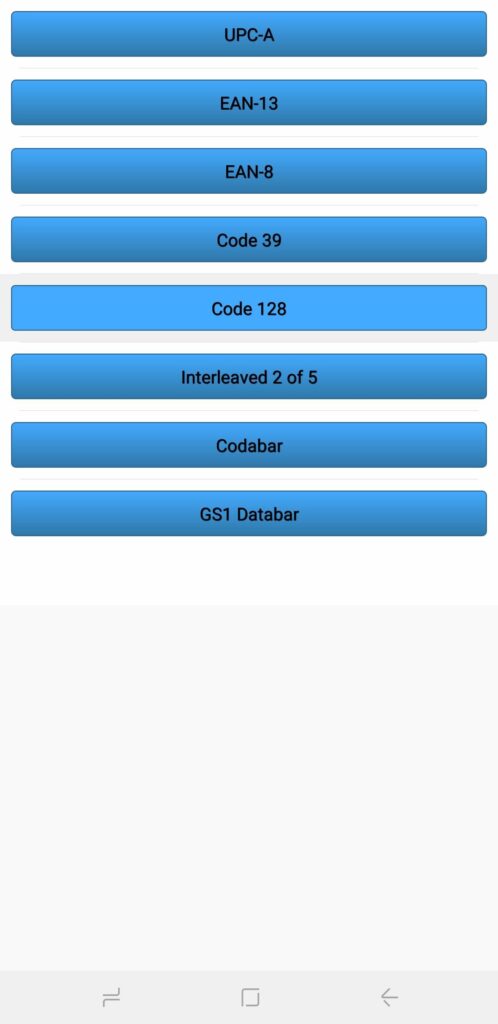
Barcode Emulator Test
To assess your device’s capability to generate barcodes accurately, select “Barcode Emulator Test.” This will lead you to a page containing various barcodes. Simply tap on each barcode and scan them with a barcode scanner to confirm they are being correctly recognized. Upon completing the test, tap the back button twice to return to the main diagnostic page.

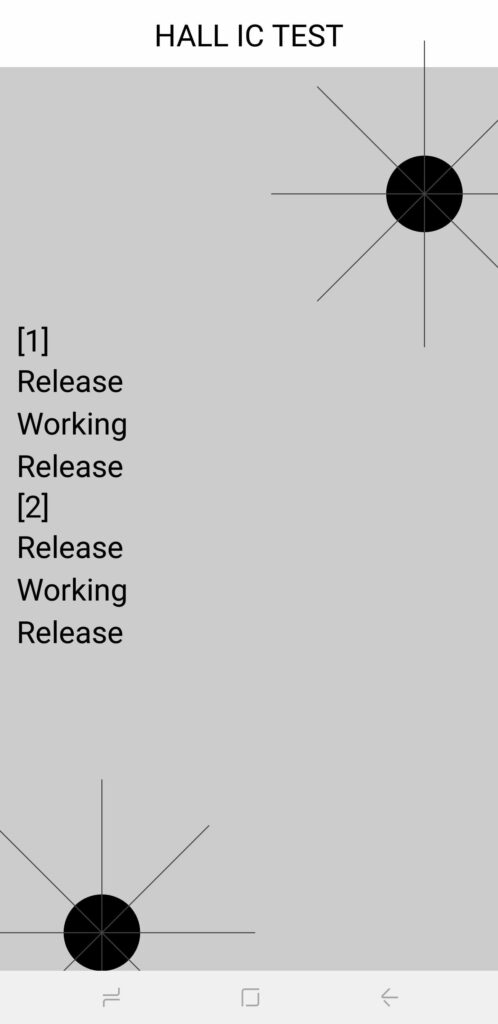
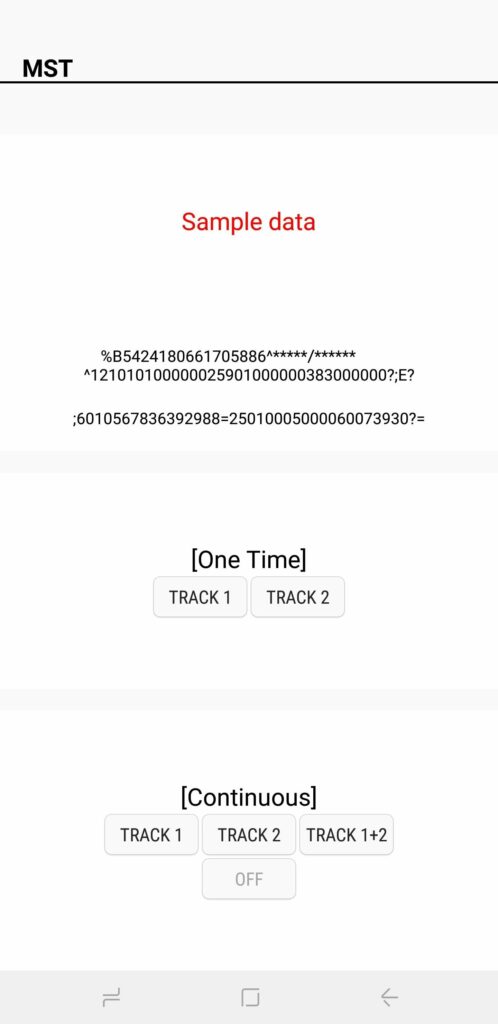
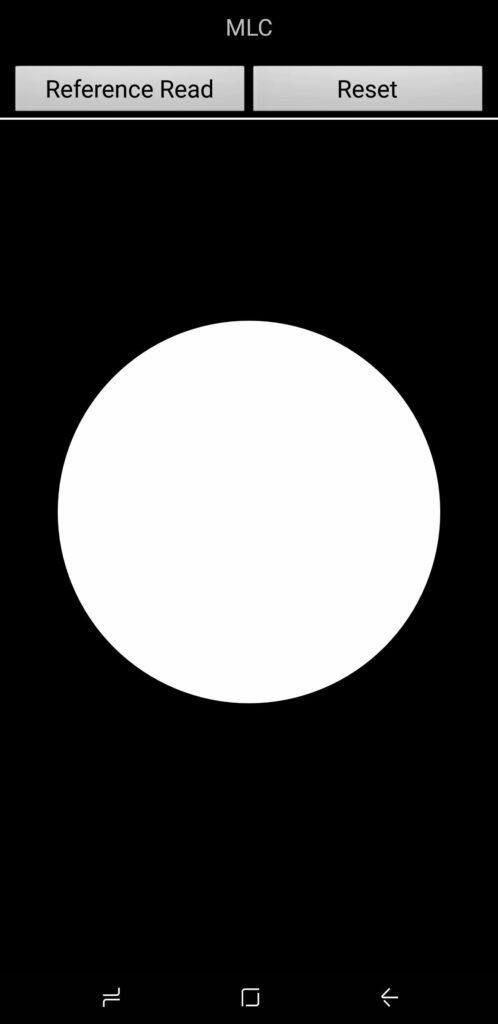
Hall IC, MST & MLC Tests
The Hall IC sensor is responsible for detecting magnetic fields, primarily used for detecting magnetic flip covers that trigger the phone’s sleep mode when the cover’s magnet comes into contact with the device. The sensor test serves as a confirmation that the Hall IC is functioning correctly.
MST, or magnetic secure transmission, allows devices to temporarily emulate a credit card, crucial for payment services like Samsung Pay. On the other hand, MLC is technology integrated into fingerprint sensors, with limited testing options, seemingly intended for developers to explore and experiment with.
Iris Camera Test
Lastly, the “Iris Camera Test” assesses the infrared iris camera responsible for device unlocking. Tapping the button activates the iris camera, prompting you to align your eyes with it. Once your iris is successfully scanned, the test concludes, and you’re returned to the main diagnostic page.
Exiting Out of HwModuleTest Mode
Upon completing your diagnostic tests, you can exit HwModuleTest Mode by tapping the back button twice, which will take you back to your phone’s dialer. From there, exit as you typically would. Now, you’re free to continue with your day, reassured that your cherished device is in proper working order!
List of Codes for Old Samsung TouchWiz Devices
| Samsung Secret Code (TouchWiz/Android 6.0 and below) | Secret Code Function | Uses |
|---|---|---|
| #0# / ##0*# | Test RGB, Receiver, Vibration, Touch sensitivity, Speakers, Camera Sensors, S-Pen, Audio loopback, Software version, etc. | Perform various hardware tests and check software version. |
| *#06# | Show IMEI Number | Display the IMEI number of the device. |
| *#03# | NAND Flash serial number | Check the serial number of NAND Flash. |
| *#80# | Touchscreen noise test | Perform a touchscreen noise test. |
| *#251# | Wakelock OFF | Disable wakelock. |
| *#251# | Wakelock ON | Enable wakelock. |
| *#526# | WLAN Engineering Mode | Access WLAN engineering mode. |
| *#528# | WLAN Engineering Mode | Access WLAN engineering mode (alternative code). |
| *#745# | RIL Dump Menu | Open the RIL (Radio Interface Layer) dump menu. |
| *#746# | Debug Dump Menu | Access the debug dump menu. |
| *#0011# | Service Mode | Enter service mode to view network and cell information. |
| *#0283# | Audio packet loopback test | Perform an audio packet loopback test. |
| *#0289# | Audio/speaker test (Melody Test Mode) | Test audio and speakers using melody test mode. |
| *#0514# | SysDump | Access system dumps, logs, and more. |
| *#0588# | Proximity Sensor test | Test the proximity sensor. |
| *#0589# | Light Sensor Test Mode | Enter light sensor test mode. |
| *#0673# | Audio/speaker-test (same as *#0289#) | Test audio and speakers (alternative code). |
| *#0782# | Real-time clock test | Perform a real-time clock test. |
| *#0842# | Vibration test | Test the vibration functionality. |
| *#1575# | GPS Control Menu | Access the GPS control menu. |
| *#2263# | RF Band Selection | Choose the RF (Radio Frequency) band. |
| *#2663# | Touchscreen FW and version | Check touchscreen firmware and version. |
| *#2664# | HW touchscreen test | Perform a hardware touchscreen test. |
| *#3264# | RAM check (version number) | Check RAM and version number. |
| *#7769# | Proximity sensor test | Test the proximity sensor. |
| *#7284# | Phone utility and USB driver | Access phone utility and USB driver settings. |
| *#7353# | Function tests | Perform 12 types of function tests. |
| *#7594# | Factory mode / Enable shutdown | Enable shutdown on long press and access factory mode. |
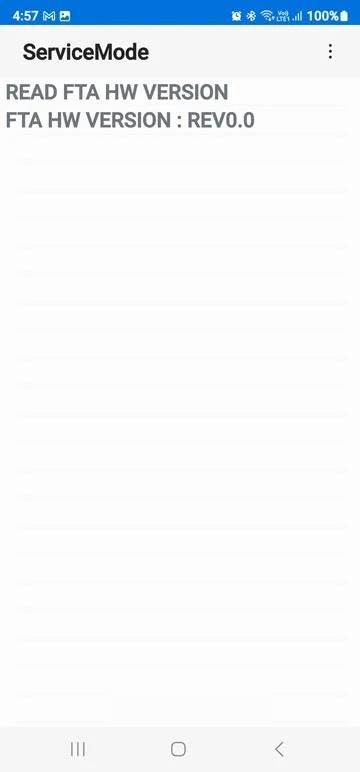
| *#8888# | Service Mode (Read FTA hardware version) | Read FTA (Factory Test) hardware version. |
| *#9900# | System Dump Mode | Enter System Dump Mode for advanced diagnostics. |
| *#9999# | Software versions (AP, CP, CSC, FTA SW) | Check software versions for different components. |
| *#2222# | Hardware version | Check the hardware version of the device. |
| *#1234# | View SW Version PDA, CSC, MODEM | Check software version for PDA, CSC, and MODEM. |
| *#0228# | Battery diagnostics | Check battery diagnostics, including ADC and more. |
| *#9090# | Service Mode | Access service mode for network-related information. |
| *#301279# | HSDPA/HSUPA Control Menu | Access HSDPA/HSUPA control menu for data settings. |
| *#4238378# | GCF Configuration | Configure GCF (Global Certification Forum) settings. |
| ##197328640## | Test mode for service activity | Enable test mode for service activity and view manufacturing date. |
| *#232331# | Bluetooth test | Access Bluetooth test settings. |
| *#232337# | Bluetooth address | Display the Bluetooth address of the device. |
| *#232338# | WLAN MAC address & PS mode | Show WLAN MAC address and Power Saving (PS) mode. |
| *#232339# | WLAN Engineering Mode test | Access WLAN Engineering Mode test, including TX & RX modes (same as #526). |
| *#8736364# | OTA update menu | Open the OTA (Over-The-Air) update menu. |
| *#7412365# | Camera firmware standard | Check camera firmware for both front and rear cameras. |
| *#7465625# | Personalization (lock status) | Access personalization settings, including lock status. |
| *#22558463# | Reset Total Call Time | Reset the total call time counter. |
| #12580369# | Main Version | Display main version information, including AP, CP, CSC, RF cal, and HW revision. |
| #3282727336*# | System and storage information | Check system and storage information, including data usage statistics. |
| 2767 *3855# | Wipes Samsung phone completely | Perform a complete wipe of the Samsung phone. |
| ##7780## | Reset to factory state | Reset the phone to factory state, deleting apps and app data. |
| ##7594## | Enable direct power off | Enable direct power off without showing the Power Menu when holding the Power button. |
| ##232338## | Display Wi-Fi MAC address | Display the Wi-Fi MAC address of the device. |
| ##49862650468##* | PDA, Phone, Hardware, RF Call Date | View information about PDA, Phone, Hardware, and RF Call Date (or manufacturing date). |
| ##778 [dial] | View EPST menu | Access the EPST (Engineering Parameter Settings) menu. |
Whether you want to check manufacturing dates, access engineering modes, test your device’s hardware, or configure settings, these Samsung secret codes are a valuable tool for diagnosing and customizing your Samsung device.
Download Samsung Secret Codes List PDF
FAQs:
What are the USSD codes?
USSD (Unstructured Supplementary Service Data) codes are code-based commands used for communication between mobile phones and cellular networks. Typically starting with an asterisk (*) followed by numbers, users enter these codes directly into their phone’s dialer to access services like checking balances, managing features, and more, provided by their carrier. These codes vary by carrier and offer a swift and convenient way to access critical information and services without requiring a smartphone app or internet connection.
How do you use secret codes on Samsung?
To use secret codes on Samsung:
- Open the Phone Dialer app.
- Dial the specific code (usually starting with
*#). - Press the call button.
- Access hidden menus or functions.
- Use them responsibly, as they vary by device and can affect settings.
What is the code to check original Samsung?
#0# is the default code for verifying the authenticity of your Samsung device. Additionally, this menu allows you to assess various hardware and software settings and versions.
How do I unlock Samsung secret menu? What is #4636# Android secret code?
Unlocking secret menus on Samsung phones using USSD codes is a straightforward process. Simply open the Dialer app on your device and enter the secret code ##4636## to access the hidden menu.
If this code doesn’t work, you can also try *#4636# or ##4636##. Once in the secret menu, you can perform hardware diagnostics by following the on-screen instructions.
The Android USSD code #4636# on Android phones opens a hidden menu where you can test all the different parts of your smartphone. If that code doesn’t work, you can also try ##4636## or *#*#4636#*#* to access the same menu. Once there, you can check and diagnose your phone’s hardware by following the instructions on the screen.
What is the code to check Samsung touch screen?
Simply dial *#2663# to perform a touchscreen test on your Samsung device.
What does *#0*# do on Samsung?
#0*# is like a secret code that helps you test all the parts of your Samsung phone to make sure they’re working okay. It’s also called Engineering mode because technicians and engineers use it to find and fix problems with the phone using the diagnostic test menu.
You can also use #*#0*#*#* USSD code to check if your smartphone screen is working properly.
How do I know if my phone is brand new or refurbished using secret USSD codes?
If you bought a smartphone online or in a physical store and want to verify whether it’s new or refurbished, you can use USSD codes for confirmation.
To access the Reconditioned status menu of your device, simply enter the USSD code *#*#786#*#* in the dialer app.
If the Reconditioned status is displayed as “Yes,” it means your phone is refurbished. If it shows “No,” your phone is brand new.
Conclusion
In summary, Samsung secret codes provide a powerful way to unleash advanced features on Galaxy devices. While the specific codes may vary across models and Android versions, key options like hardware tests, mobile network data, and developer settings are accessible through these backdoor numeric passcodes. Used properly and responsibly, secret codes offer an expert toolkit to diagnose issues, customize your phone, evaluate components, and monitor internal operations.
Next time you need to check your Samsung device’s performance, connectivity, authenticity or dive into advanced options, don’t forget to try inputting a relevant secret code. Just be cautious, enter codes carefully, and avoid options that may alter important device settings without your knowledge. With this guide, you can tap into the full spectrum of hidden tools on your Galaxy phone confidently using Samsung secret codes.